November 29, 2008

More Routing Fun

I'm writing this blog just after I posted the last so be sure to scroll down and read about cutting the binding channel.

A trick I picked up over on the MyLesPaul.com forum is that you can cut another channel where the top of the binding is supposed to be. This channel will serve as a reference for carving the top. What the channel tells you when you are carving is, "don't carve below this point". Opinions vary on how tall the binding is supposed to be but I carved my channel at 6mm high which is how tall I think the binding should be.

For this cut I used a rabbeting bit. A rabbet is a type of cut used to join two pieces of wood. While the cut I'm making isn't a rabbet the bit works for my purpose.

Here are some pics after finishing the cut:
Photobucket
Photobucket
Photobucket
Photobucket

Notice I didn't cut all the way around. I did this because I wanted to be sure that I didn't interfere with my neck angle cut and I didn't want to screw up the carve inside of the horn. If necessary I can go back later and cut some more. The cut was a little larger than I would have liked but it will not matter when the body is carved. I'm actually really excited to have reached this point.

One other thing I have been working on is a jig for cutting the neck angle in the top of the guitar. I've seen a few ways to make this cut and this is the jig I built to do it:
Photobucket
As you can see the body fits inside of the box. The top of the box has rails that will serve as tracks for a router guide.

Here's a pic of the guide resting on the rails. Note the hole in the middle that will let the router bit pass through.
Photobucket

The back of the box will be propped up until the box is tilted at four degrees which is the angle I will cut in the front of the guitar body so the neck fits correctly.
Photobucket

Actually making the cut will probably happen on Monday.

Finaly Getting To the Binding

Ok, I finally had some time to get back to work on my Les Paul project. It kind of sucks when real life gets in the way of your hobbies but that's the way it goes.

I wanted to get the body to the point where I can start carving the top. There are three things in the way of doing the carving: routing the binding channel, routing the body to accept the angle of the neck, and routing the mortice for the neck. I can carve the body without routing the neck mortice if I want so I'm putting off the decision as long as possible.

For my readers that don't have a lot of guitar knowledge binding is a strip of plastic, wood, or cellulose that encircles the guitar body and sometimes the fretboard. Mostly binding is decorative although it can help protect the edges of the body. Most Les Paul guitars have binding only on the top edge of the guitar body. However Les Paul Customs also have binding on the bottom of the guitar and Les Paul Studios do not have any binding at all. The '59 Les Paul is they type that has binding only on the top.

I bought Cream ABS binding from Stewart Mac. The Les Paul binding is .060" thick. In order to get this thickness after sanding you actually want to buy a thicker binding. The binding I purchased is .090" thick. It will be scraped down to the proper thickness once it's glued to the body. The binding I bought is also pretty tall and will be scraped down to the proper heights as well.

There are a few different ways to cut the binding channel. I chose to use a template router bit with a bearing that is smaller than usual. In this case I used a 1/2" router bit with a 3\8" bearing. This setup will produce a 1/16" channel. I did some test cuts on scrap wood and the channel this produced ended up being more like 3/32". When I set the binding in the channel it fit right in and was just slightly too wide. I figure when it's scraped down it will be almost perfect.

Here are some pics:

First is the bit. Sorry it's fuzzy. You can see the 3/8" bearing on the 1/2" bit:
Photobucket

When starting this type of cut you want to go slowly. This means you don't cut the full depth of the channel at first. I started by routing a shallow channel and then increasing the depth of the cut a little at a time.
Photobucket

In an earlier post I wrote about the wood sometimes tearing out. This happened when I was routing the channel. Fortunately the tearout happened at a depth that will not affect the binding channel and will be carved away. Here's a pic of the wood that was torn out. I placed it next to the place where it came out although you can't see the hole.
Photobucket

I kept adjusting the router depth until I reached 5/8" which is supposed to be the height of the maple top. My top is just shy of 5/8" so I just routed down into the mahogany a bit until the 5/8" was reached.
Photobucket

Here are some more pics of the completed channel:
Photobucket
Photobucket
Photobucket

Here are a couple of shots of me holding the binding in the channel. It sits just slightly wide of the channel which is perfect.
Photobucket
Photobucket

In related news I started feeling a need to protect the body of the guitar. I felt that just having it laying around on the work bench while I was doing other things was probably a recipe for disaster as mahogany dents easily. So I got online and found a really cheap case that fits Les Pauls at Guitar Center for $49. When I went over to Guitar Center to pick one up I found they didn't have any in stock. As I was walking out I noticed that in the entrance they had a bunch of used cases that they were selling for $20 each. I dug around in the pile of cases and ended up finding a slightly used version of the case that I originally wanted. Even better when I opened it up and checked in the storage compartment I found a perfectly good Korg chromatic tuner. Being an honest dude I brought the tuner to the attention of the door greeter. He went with me to the cashier and told her about the tuner. She notified the manager and they decided to give me the tuner with the case. So for $20 I got a cheap but servicable case and a decent tuner. No this will not be the case for the finished guitar.
Photobucket
Photobucket

November 12, 2008

Second guessing

I'm now to the point with the body where I'm about to do some things that can't be easily fixed if I screw up. As nature intended I started to second guess myself as well. I started to do some research and came across a thread on a Les Paul forum where the size of the body was discussed. In this thread it mentioned that the picture of the body on the Stew Mac plans is actually too big. Another person posted a range of measurements taken off several different Les Pauls. The body I have made was a few millimeters too big in almost every aspect.

I just spend an hour using a disk sander and an oscillating spindle sander to put the body within spec. I also took the opportunity to square up where the body and the neck come together.

I love the Stew Mac plans but the pic isn't really accurate. I searched for measurements to determine the width of the body but they weren't listed. The plan does say that some things may not be to scale but the ommission of the body width in various places is glaring. Now that I've sanded the body where it's supposed to be I find it's much closer to the Catto plan than the Stew Mac plan. Oh well, live and learn.

I'm really excited to have this out of the way because now I can route the binding channel and route for the neck angle.

November 7, 2008

The Body and Top Become One!

I finally had time to glue the maple top to the mahogany body. This process is simple enough. Slather on a bunch of glue and clamp those suckers together. Unfortunately it didn't quite work out that way.

I routed the top and body from the same template so you'd think they would come out exactly the same shape. This of course didn't prove to be the case. They were very close though. I figured I'd line them up the best I could and then take care of any discrepancies through sanding. Next time I think I will attach a roughly cut out piece of maple to a perfectly cut out mahogany body and then use the mahogany body as the template to route the maple. I think this would ensure that they line up perfectly together and save me a lot of sanding in the end.

I got some Titebond 3 glue that I had left over from an amp cabinet build and proceeded to spread it on the mahogany body. I just put enough on to cover the body liberally.
Photobucket
Photobucket
Photobucket
Photobucket

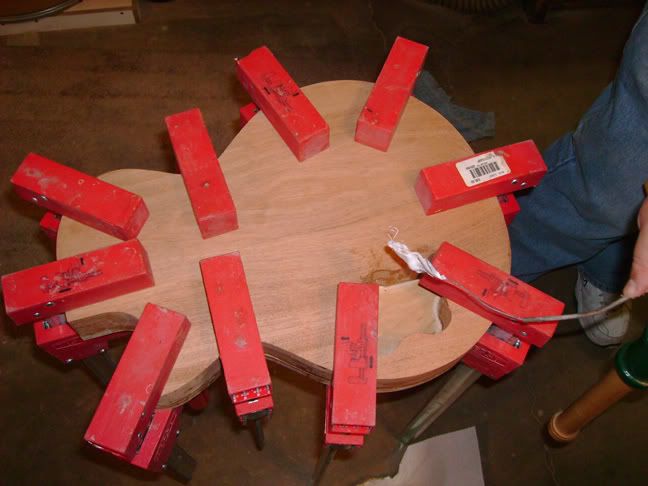
Then I put the maple top on top of the mahogany, clamped it, and presto I've successfully mated the top to the body. Wait. What is going on here? There isn't any glue squeezing out from the seem where the two pieces meet.

Whenever you glue two pieces of wood together you should have something called squeeze-out. Squeeze-out is the excess glue that leaks out from the seems. If you don't see any squeeze-out you probably haven't used enough glue.

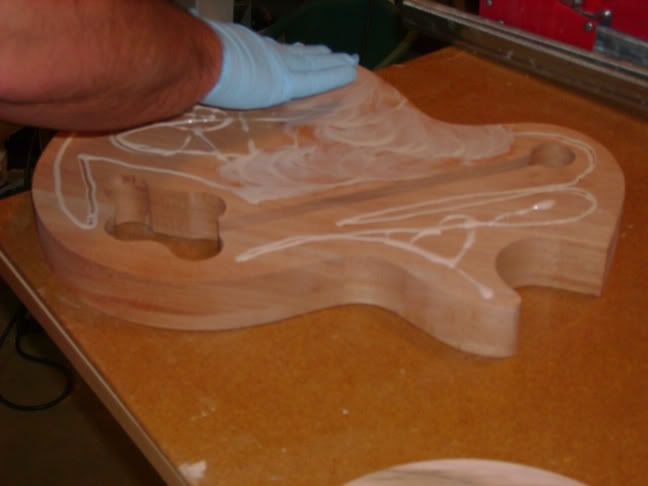
Figuring I didn't use enough glue I unclamped the pieces of wood and pried them apart. What I saw surprised me. The mahogany actually soaked up a bunch of the glue and what glue was left didn't cover much of the maple. Not only did I not use enough glue I REALLY didn't use enough glue. So I slathered a bunch more glue on the mahogany body and then slathered a bunch on the maple top then stuck them together and clamped.

Wahoooooooo, squeeze-out galore!

Ummmmmmmm, why do I have so much squeeze-out? Seriously it's not stopping. Uh oh, it's now all over the clamps and the table and the........

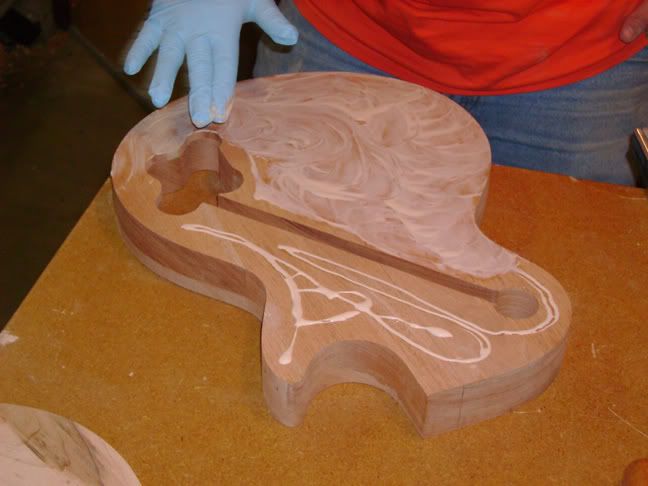
Ok, I put too much glue on which is better than not enough glue but a whole lot more messy.

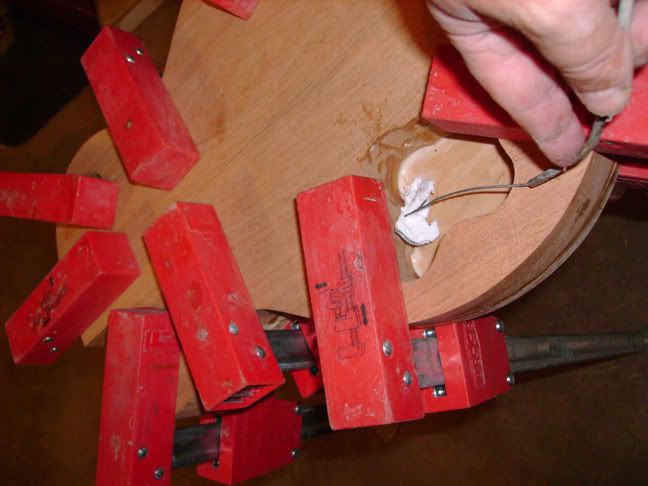
So I got a rag and started wiping up the excess glue. While doing this I realized something. Remember the wiring channel that runs between the control cavity and the pickup selector switch? Well that channel (now more of a tunnel really seeing as I covered it up with the maple top) was now filling up with the excess glue and if I didn't find a way to clean it out I would never be able to run the wires.

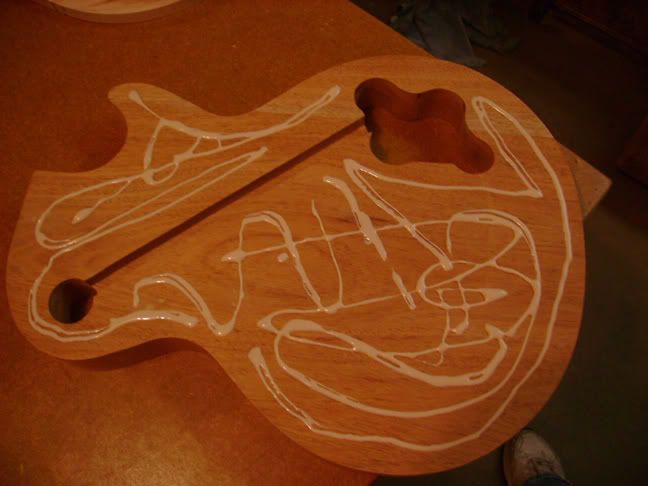
There's no way I could get a rag into the channel because it's approximately a half inch wide and a half inch tall. I had to find a solution. Fortunately I'm the proud owner of a Remington Wingmaster shotgun. Part of owning a gun is knowing how to clean it. To clean a gun you use a rod with a piece of cloth or paper attached to one end that is thrust into the barrel. I figured I could do something similar to clean out the wiring channel. Snooping around the garage I found an old choke cable from some car. The cable was flexible enough I could get it in the channel and had a small but sturdy piece of wire jutting out of it at one end. My plan was to cut up a rag into small pieces, hook these pieces to the wire end of the choke cable, and then thrust the wire with the cloth on the end in and out of the channel.

This method ended up working pretty well. I must have used fifteen different pieces of cloth to clean up the mess in the channel. Here's what my impromptu channel cleaner looked like:
Photobucket
Photobucket

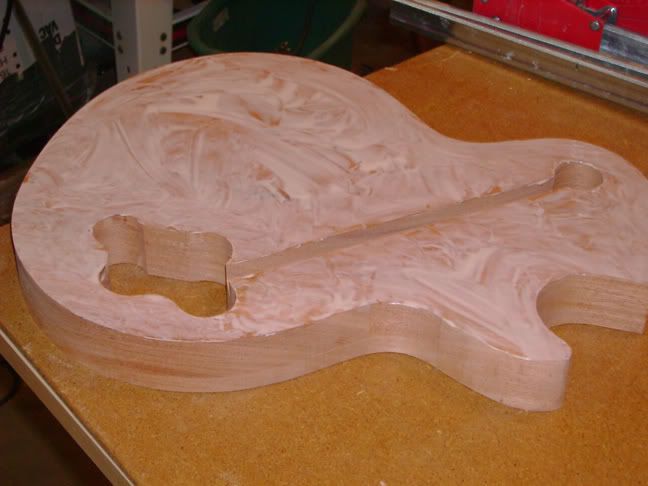
Here's a pic of the mahogany body and maple top clamped together:
Photobucket

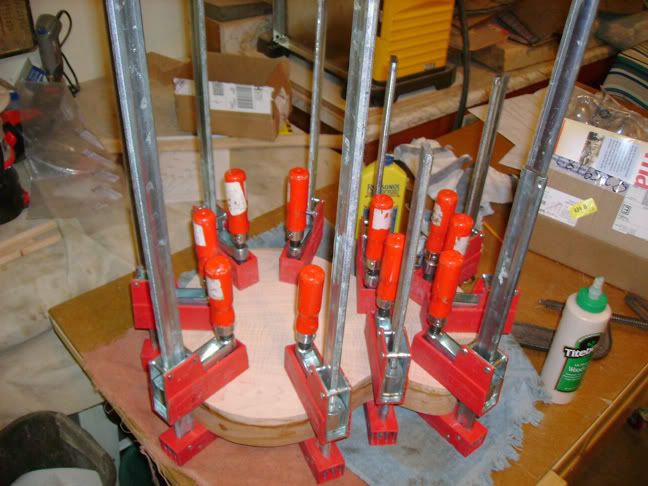
One other thing about gluing. It is possible to apply too much pressure with the clamps and squeeze out too much glue. I was careful to get the clamps tight but not too tight.

I left the guitar overnight. Unfortunately I do not have pictures when I took the guitar out of the clamps. I thought I'd wiped away all the sqeeze-out but it continued to ooze out for quite a while. When I took the clamps off I had a mess on the side of the body. No big deal because I had to true up the edges of the body because the mahogany body and maple top didn't fit perfectly together to begin with. I used a sanding wheel and the trusty oscillating spindle sander to remove the excess glue and match up the edges. I'm glad I had these tools because hand sanding would have taken forever due to all the squeeze-out.

I'll take a pic of the finished body for the next blog. Currently I'm building a jig to route the neck angle into the body. Hopefully I'll get to that in the next couple of days.

November 4, 2008

Routing the Top

So you would think that routing the top would be as straightforward as routing the body. It's not. Maple is much harder than mahogany and has a tendency to want to tear out (a big gash appears if you don't route it right) at the end grain.

First I roughed out the shape on a band saw. Then it was time to start routing.

I decided to use the router table with the template router bit with the bottom mounted bearing to do the top. First I taped the template to the top. When I cut the mahogany I cut a depth of about 1/4" at a time. Since I was only using the table router with the mapleI decided just to cut the entire 5/8" top all in one swoop since the bearing of the bit had to reach all the way up across the maple to the template.

The key with this was to just take off a little bit of material at a time. I did this by not forcing the bearing through the excess wood all the way to the template. I just used the router bit to slowy shave off the wood until the bearing finally hit the template. This worked out pretty well although in some spots the wood burned a bit.

Photobucket
Photobucket

One important thing I left out. Usually you route counter-clockwise. However when you get close to areas where end grain could be a problem you want to route clockwise because it helps prevent the end grain from ripping out.

Here are some pics of the finished top resting on the mahogany body. I posted multiple pics so you could get a better idea of the flame pattern of the wood.
Photobucket
Photobucket
Photobucket
Photobucket

Next up gluing the maple top to the mahogany body.

Routing the Cavities

Once the mahogany body was routed so it looked like a guitar it was time to route out the control, wiring, and pickup switch cavities. I used the templates I previously made for this purpose.

The first item of business was to attach the template to the newly routed mahogany body. One mistake I didn't make is to go crazy with the double sided tape. This time I cut out four small squares of tape and used them to attach the template. I also used a bit of tape along the edges just to keep things stable.

I started with the control cavity. There was no reason to wear out my router bits to get rid of all that material so I used forstner bits to hog out most of the material:
Photobucket
Photobucket

Once I got a bunch of the material out it was time to break out the template routing bit with the top mounted bearing and start finishing the cavity:
Photobucket

Just like when I cut out the body the router bit wasn't quite long enough to finish the job.I finished the job with a table router with a template router bit with the bearing mounted on bottom.
Photobucket

Here's what the control cavity looks like finished.
Photobucket

For the pickup switch cavity I just used the same 1 3/8" forstner bit I'd used to cut the template. I fit the bit inside the template hole and then just drilled down with the drill bit. This technique worked perfectly.
Photobucket

Next came the wiring channel that runs between the pickup switch cavity and the control cavity. I used a seperate template for this. The cavity is approximately a half inch deep and gets covered up when the maple top is glued on.
Photobucket
Photobucket

I was really happy with how the routing went today. The cavities are perfect.