I'm back.
Last August I ended up getting asked to coach my nephews football team as there weren't many coaches available in his community. My brother and I agreed to take the job. Each day after work I ended up having a 45 minute commute each way to practice four days a week. I'm also a high school football official so every day but Sunday was filled with football through Thanksgiving.
On Thanksgiving I played in a Turkey Bowl and ended up messing up a knee. I spent most of December chilling out. Last week I had surgery and everything went well. I'm up and at it and finally have some time to start finishing my build.
I've already started up the build. I just finished a fret bender and bought a fret press. I'll update on that stuff in the next couple of days.
I hope all of you are well!
January 26, 2010
July 12, 2009

July 4th Holiday Was Good To Me
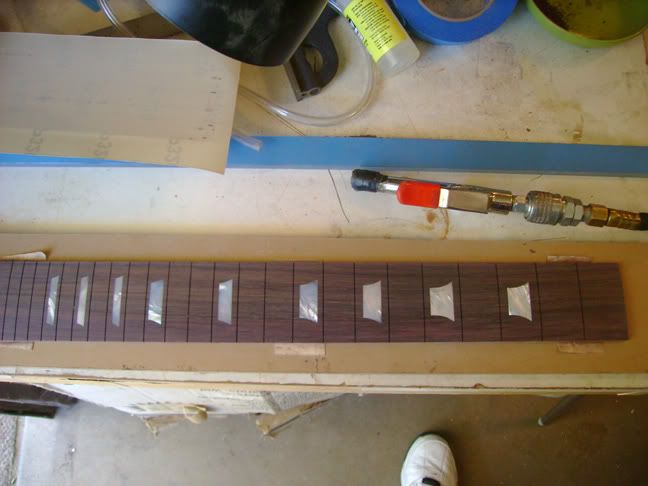
I had a chance to inlay the fretboard. I used a similar setup to last time I attempted this process although I used a precision square as a fence for my Dremel. I also used some straight bits that I got from StewMac.com. Oh lest I forget I also got an air pump that hooks onto the precision router base and blows air onto the area I'm inlaying and clears out the dust so you can see.
Here's my inlay setup:
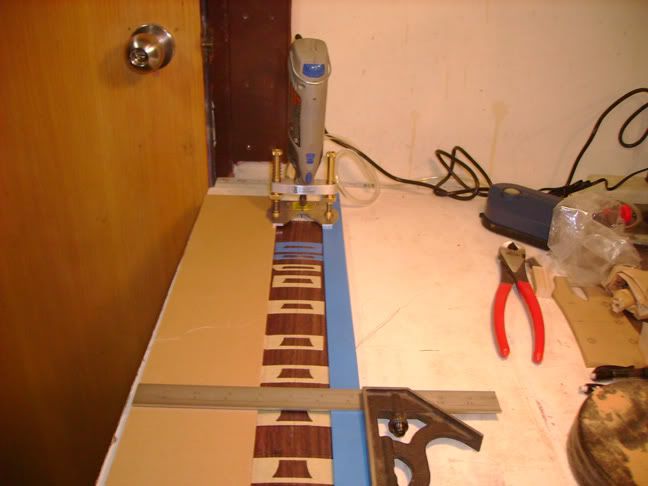
I I used strips of acrylic as rails on which the Dremel router base could rest. The acrylic strips were secured to the table with double sided tape.
Here is a test fit of the inlays:
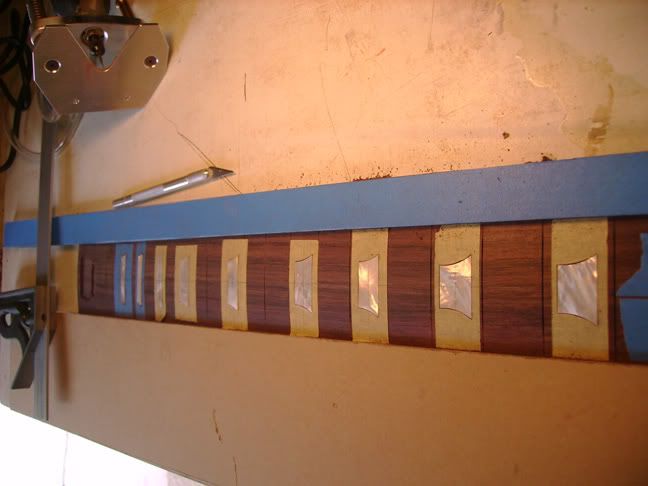
Everything fit well so I glued in the inlays with two part epoxy. In the next pic you can see how the inlays stick up a bit:
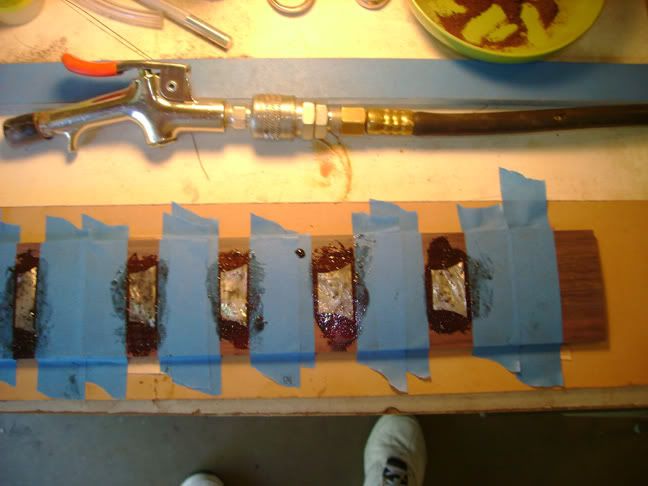
The next step was to sand the inlays flush with the fretboard using my twelve degree radius block with 120 gritt adhesive sandpaper.
Once the inlays were flush with the fingerboard I used more epoxy that was tinted from the dust leftover from routing to fill in any gaps that were left from the routing process. Worthy of note is that I learned from the mistakes of the last fretboard and taped ever the fret slots before spreading the glue around the top of the inlay. This ensured that I didn't have to clean glue from the fret slots.
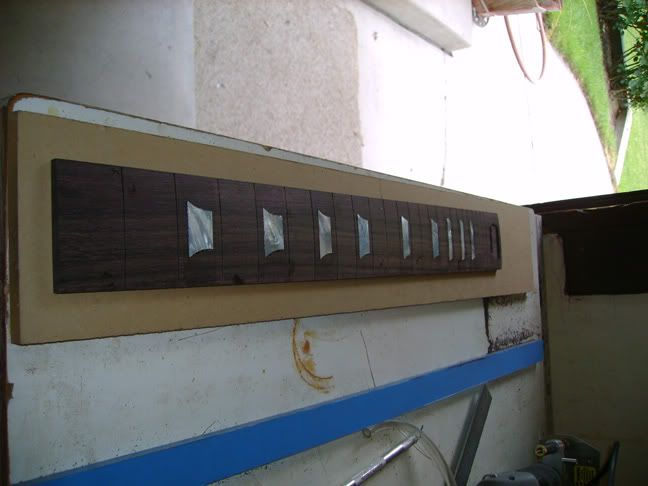
Here's the finished product sanded with 320 grit sandpaper:
Tomorrow I will taper the fretboard and maybe even install the frets. I hope to have the binding on by Tuesday.
Here's my inlay setup:

I I used strips of acrylic as rails on which the Dremel router base could rest. The acrylic strips were secured to the table with double sided tape.
Here is a test fit of the inlays:

Everything fit well so I glued in the inlays with two part epoxy. In the next pic you can see how the inlays stick up a bit:

The next step was to sand the inlays flush with the fretboard using my twelve degree radius block with 120 gritt adhesive sandpaper.
Once the inlays were flush with the fingerboard I used more epoxy that was tinted from the dust leftover from routing to fill in any gaps that were left from the routing process. Worthy of note is that I learned from the mistakes of the last fretboard and taped ever the fret slots before spreading the glue around the top of the inlay. This ensured that I didn't have to clean glue from the fret slots.

Here's the finished product sanded with 320 grit sandpaper:

Tomorrow I will taper the fretboard and maybe even install the frets. I hope to have the binding on by Tuesday.
June 28, 2009
Peghead Overlay Woes
On a vintage Les Paul they use a piece of holly (a wood species that works great for inlay work) to overlay the peghead. This holly is usually planed down to around 1/16". I visited my local wood emporium and picked out a nice piece of holly. The stuff is expensive costing around $24 per board foot.
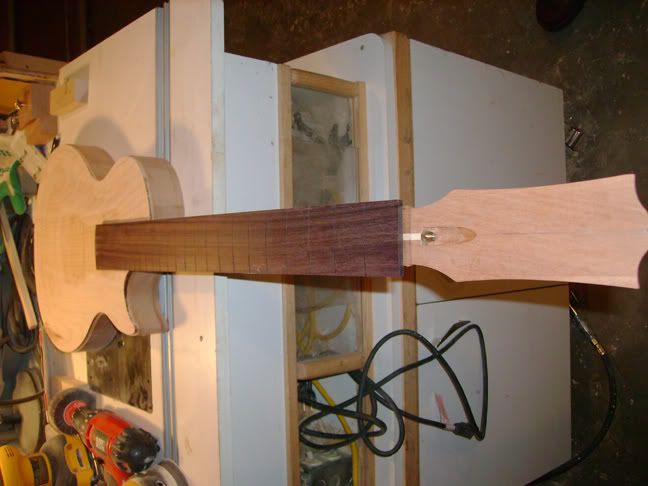
I proceeded to plane the holly down using the same DeWalt planer I used for the body wood. The very lowest setting of the planer actually got the wood to around 3/32" thick. I then cut off a rectangular piece and traced the outline of the headstock shape. Then I used my Dremel to cut out the truss rod adjustment hole. I then lined up the holly on top of the peghead and glued it on. After the glue was dry I used my template routing bit to cut the overlay flush with the peghead. This is what I was left with:
Everything seemed to have gone well but upon closer inspection I spotted a flaw. Can you see it?
If you look at the top right wing of the overlay you will notice that the pointy part is screwed up. This becomes apparent when you compare it with the other side. This flaw made me sick. It turns out the peghead beneath the holly was flawed before I ever glued on the overlay. Because of the color of the mahogany the flaw was hard to spot. I inspected the template I used to cut the peghead shape and found the problem. Somehow the template was damaged so the flaw in it was transfered to the peghead and then to the peghead overlay.
I had three choices to fix the problem:
1. Make a different neck and use the flawed neck for something else.
2. Alter the shape of the headstock into something that looked cool and hid the flaw.
3. Grind off the holly overlay, cut of the wings I'd glued on the headstock, and start over again reshaping the headstock.
I was leaning toward option number two and started mocking up some options for reshaping the peghead. Here are some examples:
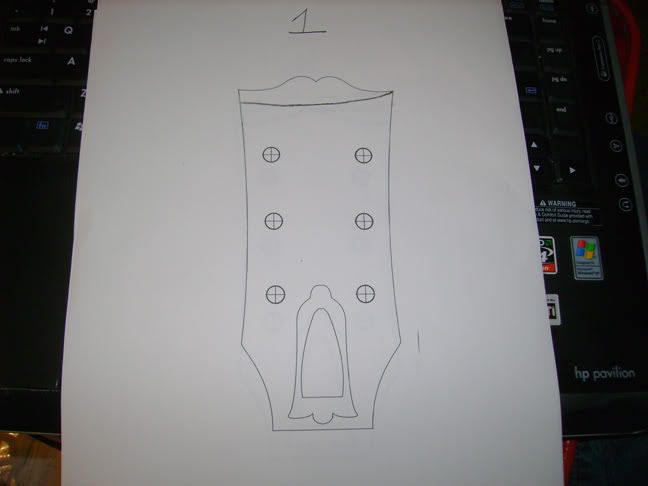
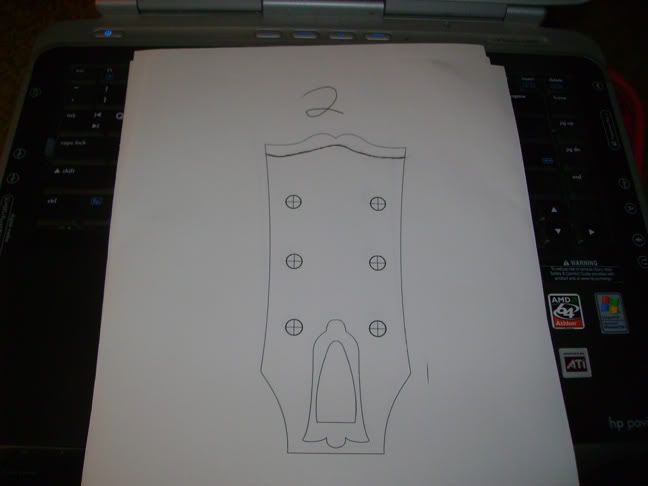

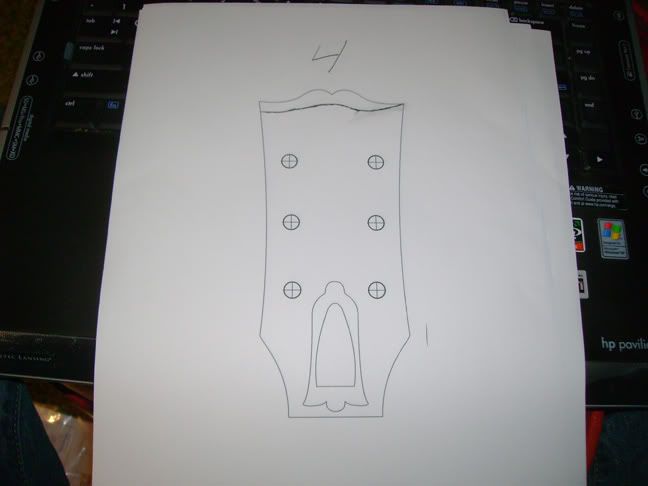
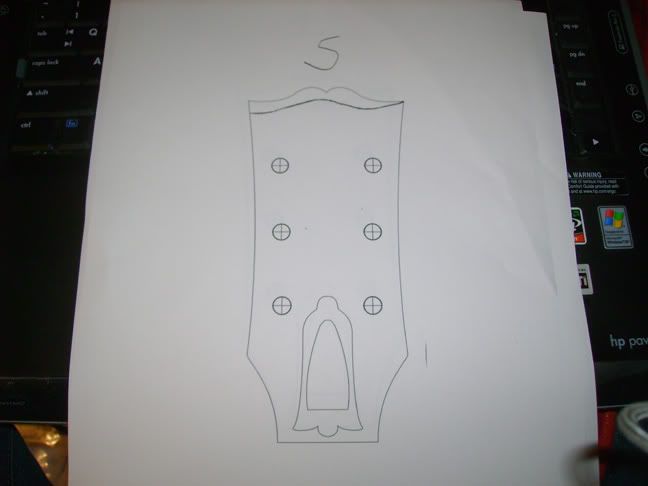
My favorite was option number five. The downside is that it looked a bit like the ESP brand's peghead.
Reshaping the peghead has one other disadvantage, the peghead no longer looks like a classic Les Paul shape. To be honest this really didn't bother me as I wanted to personalize the guitar somehow and a new peghead shape would accomplish that task. Still, I was torn between wanting the classic Les Paul shape and something new. My inability to decide between the two shapes delayed the build of this guitar for a couple of months.
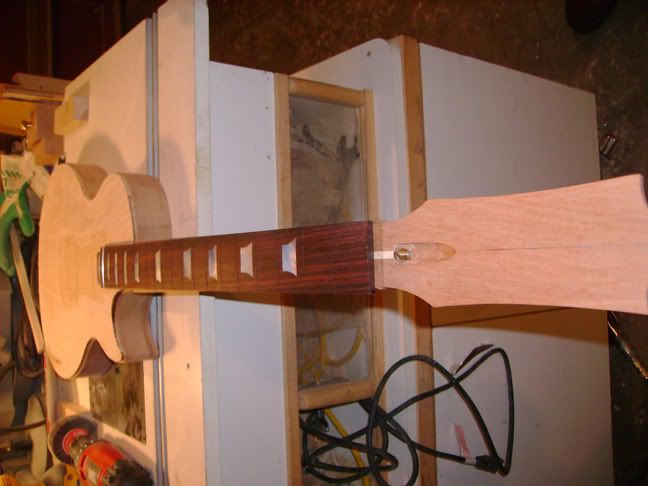
Finally I decided that when in doubt go with the original idea. I ground off the holly overlay, cut off the wings, glued on new wings, made a new headstock template without the flaw, cut out the peghead with the new template, made a new piece of holly, cut out the truss rod access hole, glued on the overlay, and finally cut out the shape of the overlay.
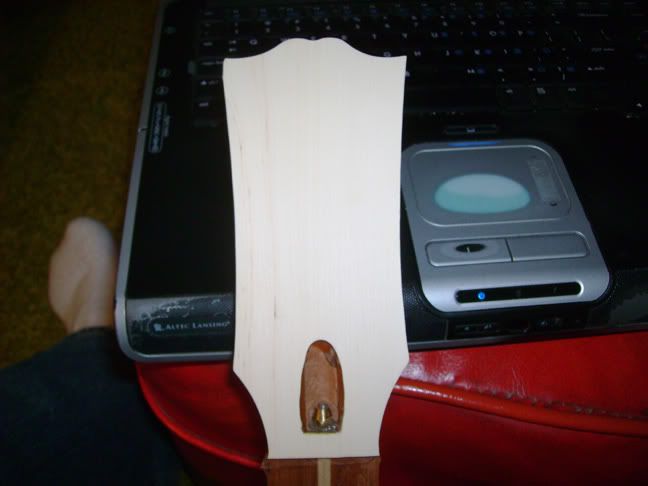
Here's the new peghead:
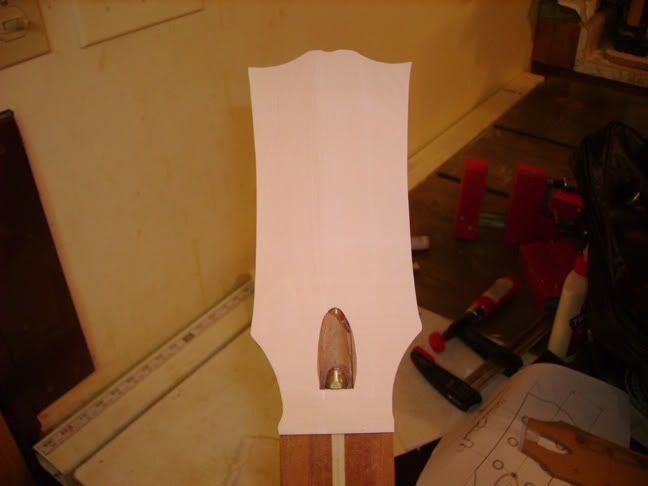
I have cleaned up the overlay a bit and it looks great. I planed the overlay down to 1/16". I also started to plane down the back of the headstock to thickness using the oscillating spindle sander. My new Kluson tuners arrived so I will be drilling the tuner holes this week. The top middle part of the headstock still needs a little carving because the router will not quite finish off the intricate shape.
Remember how I screwed up my first fretboard? This week I will be inlaying the new fretboard and hopefully cutting the taper, fretting, and installing the binding. I'm hoping to have this guitar ready for finish in the next couple of weeks because I need it for a gig in August.
I proceeded to plane the holly down using the same DeWalt planer I used for the body wood. The very lowest setting of the planer actually got the wood to around 3/32" thick. I then cut off a rectangular piece and traced the outline of the headstock shape. Then I used my Dremel to cut out the truss rod adjustment hole. I then lined up the holly on top of the peghead and glued it on. After the glue was dry I used my template routing bit to cut the overlay flush with the peghead. This is what I was left with:

Everything seemed to have gone well but upon closer inspection I spotted a flaw. Can you see it?
If you look at the top right wing of the overlay you will notice that the pointy part is screwed up. This becomes apparent when you compare it with the other side. This flaw made me sick. It turns out the peghead beneath the holly was flawed before I ever glued on the overlay. Because of the color of the mahogany the flaw was hard to spot. I inspected the template I used to cut the peghead shape and found the problem. Somehow the template was damaged so the flaw in it was transfered to the peghead and then to the peghead overlay.
I had three choices to fix the problem:
1. Make a different neck and use the flawed neck for something else.
2. Alter the shape of the headstock into something that looked cool and hid the flaw.
3. Grind off the holly overlay, cut of the wings I'd glued on the headstock, and start over again reshaping the headstock.
I was leaning toward option number two and started mocking up some options for reshaping the peghead. Here are some examples:


My favorite was option number five. The downside is that it looked a bit like the ESP brand's peghead.
Reshaping the peghead has one other disadvantage, the peghead no longer looks like a classic Les Paul shape. To be honest this really didn't bother me as I wanted to personalize the guitar somehow and a new peghead shape would accomplish that task. Still, I was torn between wanting the classic Les Paul shape and something new. My inability to decide between the two shapes delayed the build of this guitar for a couple of months.
Finally I decided that when in doubt go with the original idea. I ground off the holly overlay, cut off the wings, glued on new wings, made a new headstock template without the flaw, cut out the peghead with the new template, made a new piece of holly, cut out the truss rod access hole, glued on the overlay, and finally cut out the shape of the overlay.
Here's the new peghead:

I have cleaned up the overlay a bit and it looks great. I planed the overlay down to 1/16". I also started to plane down the back of the headstock to thickness using the oscillating spindle sander. My new Kluson tuners arrived so I will be drilling the tuner holes this week. The top middle part of the headstock still needs a little carving because the router will not quite finish off the intricate shape.
Remember how I screwed up my first fretboard? This week I will be inlaying the new fretboard and hopefully cutting the taper, fretting, and installing the binding. I'm hoping to have this guitar ready for finish in the next couple of weeks because I need it for a gig in August.
May 6, 2009
Getting the Rest of the Carve Right and Finish Sanding
I finally got around to finishing up the recurve on my top carve. To get it where I wanted it I used my scrapers. It's awesome how well the scrapers carve once you figure out how to use them correctly. I also painted the top with a flat black so I can sand and see the flaws.
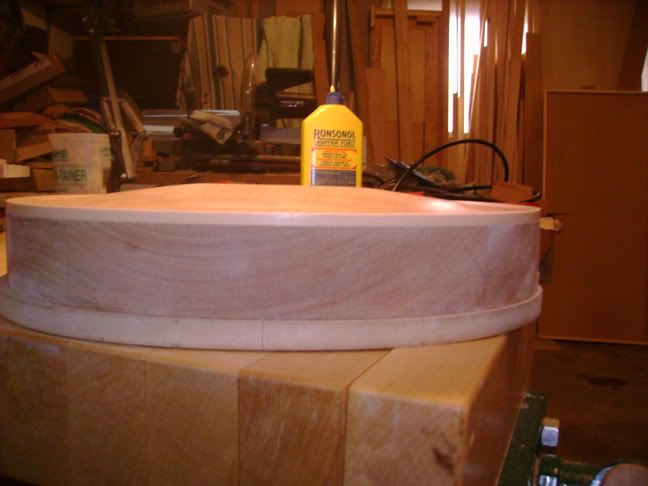
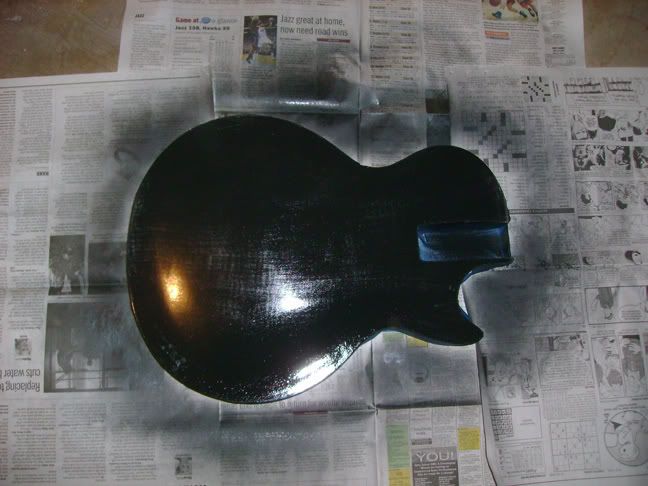
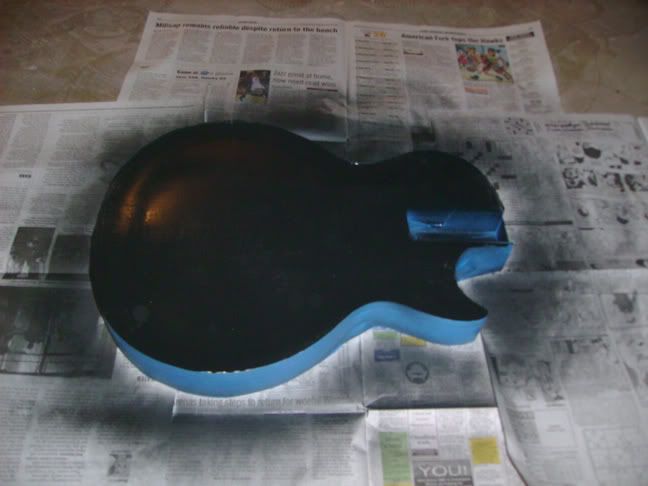
A little more on the black paint. The paint is helpful because as you sand the paint off the guitar the low spots will retain the paint. It is important to sand out these low spots or the finish may have flaws. The key is to keep sanding until the black paint disappears which means the low spots have been sanded out.


A little more on the black paint. The paint is helpful because as you sand the paint off the guitar the low spots will retain the paint. It is important to sand out these low spots or the finish may have flaws. The key is to keep sanding until the black paint disappears which means the low spots have been sanded out.
Binding Part 3
Sorry I haven't been around for a while. My job schedule has changed leaving me less time to work on the project. Also this is my twentieth year as a baseball umpire and since the season is here...... Last time we left I'd successfully corrected my binding channel issues. With that done it was time to redo the binding. Here's how I did it: I cleaned up the body with naphtha and then masked most of the mahogany on the side so I could protect it from the glue. This technique worked well and I recommend it. 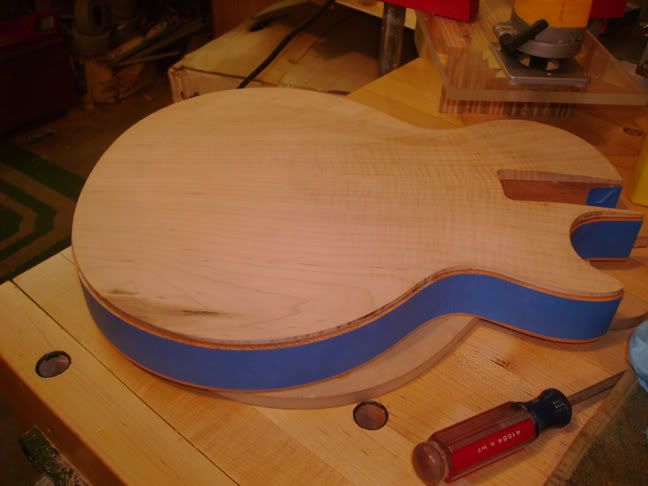 In my last attempt at gluing on the binding I used some glue that's designed for the task. I later learned that there is another way. One of the two ingredients in my new binding glue is acetone. For those who don't know acetone is the primary ingredient in fingernail polish remover. In fact, most fingernail polish remover is 100% acetone. You can buy acetone at Home Depot in a industrial looking container but I chose to go down to the drugstore and get the same fingernail polish remover the hot chicks use. I figured that this choice might add some mojo to the finished instrument.
 In my last attempt at gluing on the binding I used some glue that's designed for the task. I later learned that there is another way. One of the two ingredients in my new binding glue is acetone. For those who don't know acetone is the primary ingredient in fingernail polish remover. In fact, most fingernail polish remover is 100% acetone. You can buy acetone at Home Depot in a industrial looking container but I chose to go down to the drugstore and get the same fingernail polish remover the hot chicks use. I figured that this choice might add some mojo to the finished instrument.
The other ingredient in my new binding glue is the binding itself. Actually it is pieces of binding cut up very small. The tiny pieces of binding are added to the acetone and melt. It's the combination of the acetone and binding that make the glue. The reason this acetone/binding glue is so good is that it is literally liquid binding. If there are gaps it will fill them with the same ABS plastic from which the binding is made. This glue also sets much more quickly than the stuff I'd previously used. I used two ounces of acetone and a bunch of bits of binding. I left the mixture for a couple of hours and then started stiring. Sure enough the binding pieces were beginning to melt in the acetone. I knew that the melting process was going to take far longer than a few hours so I let the mixture sit overnight and until four pm the next day. When I came back and stirred the mixture was the consistency of Elmers glue. This worked out perfectly for my purpose. The ratio of acetone to binding bits is a little bit of a guess. I just kept adding binding bits until it looked like the glue would come out ok. 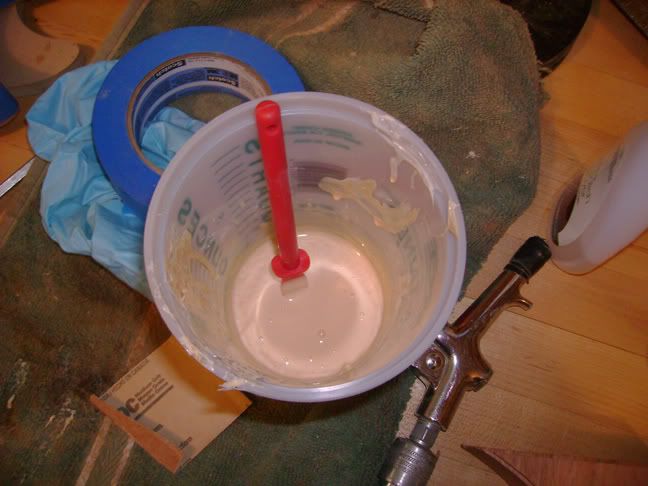 I used a plastic glue stick to spread in the channel. I tried to work from the top and really worked to try and only have minimal squeezout. I failed because I had plenty of squeezout. After I spread the glue on roughly three inches of the channel, I held the binding with my fingers. After about two minutes it would set enough that I could let go. I did put some binding tape on the edge of where I spread the glue just to make sure things stayed nice and tight but I probably didn't need it. After the binding tape I'd use a small metal ruler like a spatula and scooped up a lot of the squeezout. I used my el cheapo heat gun (three cheers for Harbor Freight) to mold the binding into the waist and the horn. You really need to be careful not to apply to much heat. My method was to tape the binding in place and then heat it up using the low setting. I removed the tape only when the binding had cooled. The tip of the horn was the toughest. It was the only place where the binding actually stuck out farther than the mahogany. I'm not sure if I pressed it in tight enough or just goofed up routing the channel.
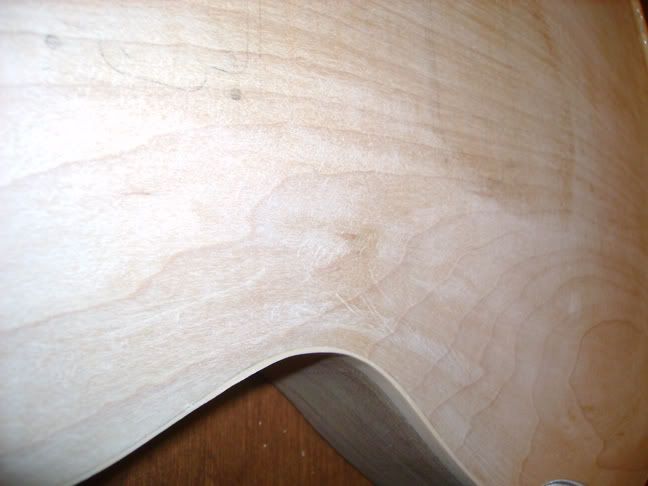
 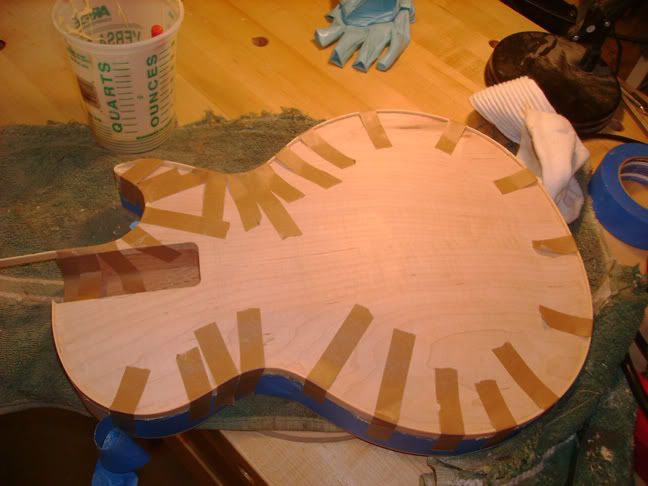 This time the mahogany was just a little wider than the binding. One the side I used my scraper and scraped down the mahogany to match the binding. It wasn't very hard as the mahogany was pretty close to being even with the binding. I was most concerned about the tip of the horn. I pulled the tape off and couldn't tell what was happening because of the squeezout. as I sanded the tip into shape I found that I was saved by the acetone glue as I didn't quite get the very tip in as tight as a could have but the glue filled things in nicely. When I finished sanding the tip it appeared to be the same width as everything else. That made me quite happy. There was one tiny gap in the horn about a quarter of the size of a pinhead. It wasn't because the binding wasn't tight it was because there was just a tiny bit of glue missing in that spot. I filled it with the acetone glue and left it. Two hours later I went back and sanded it and this is what was left:
 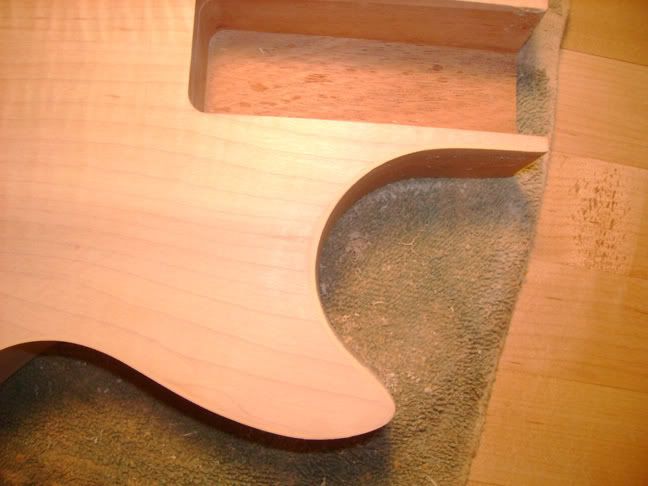 Here are a few more pics:
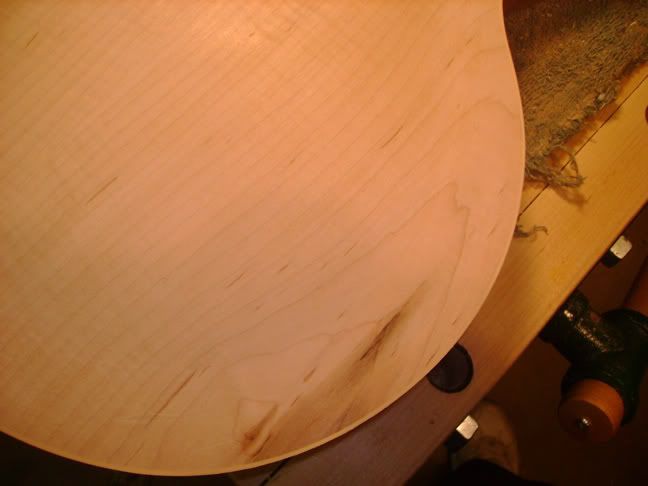
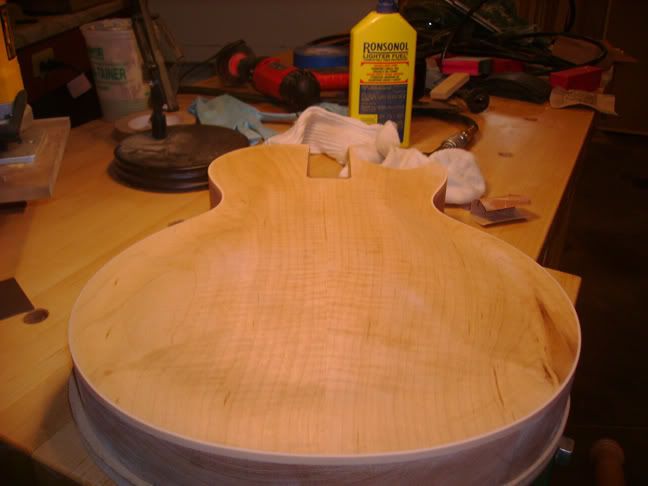
 Here is a better shot of the horn. Inside the tip of the horn a couple of inches it looks like there's a high spot. It's actually an optical illusion.
 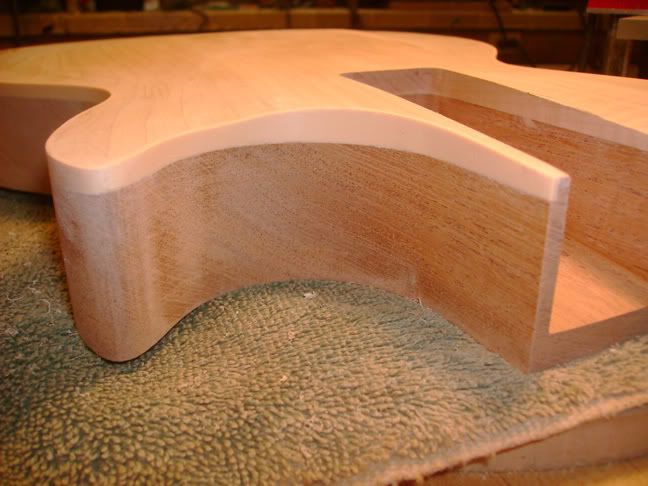 All said I'm extremely happy. The binding is tight and there are no gaps. It looks really good up close. I'm excited to finish it off with some 320 grit and then finish sanding the recurve. Here's another video:
 I used a plastic glue stick to spread in the channel. I tried to work from the top and really worked to try and only have minimal squeezout. I failed because I had plenty of squeezout. After I spread the glue on roughly three inches of the channel, I held the binding with my fingers. After about two minutes it would set enough that I could let go. I did put some binding tape on the edge of where I spread the glue just to make sure things stayed nice and tight but I probably didn't need it. After the binding tape I'd use a small metal ruler like a spatula and scooped up a lot of the squeezout. I used my el cheapo heat gun (three cheers for Harbor Freight) to mold the binding into the waist and the horn. You really need to be careful not to apply to much heat. My method was to tape the binding in place and then heat it up using the low setting. I removed the tape only when the binding had cooled. The tip of the horn was the toughest. It was the only place where the binding actually stuck out farther than the mahogany. I'm not sure if I pressed it in tight enough or just goofed up routing the channel.
  This time the mahogany was just a little wider than the binding. One the side I used my scraper and scraped down the mahogany to match the binding. It wasn't very hard as the mahogany was pretty close to being even with the binding. I was most concerned about the tip of the horn. I pulled the tape off and couldn't tell what was happening because of the squeezout. as I sanded the tip into shape I found that I was saved by the acetone glue as I didn't quite get the very tip in as tight as a could have but the glue filled things in nicely. When I finished sanding the tip it appeared to be the same width as everything else. That made me quite happy. There was one tiny gap in the horn about a quarter of the size of a pinhead. It wasn't because the binding wasn't tight it was because there was just a tiny bit of glue missing in that spot. I filled it with the acetone glue and left it. Two hours later I went back and sanded it and this is what was left:
  Here are a few more pics:

 Here is a better shot of the horn. Inside the tip of the horn a couple of inches it looks like there's a high spot. It's actually an optical illusion.
  All said I'm extremely happy. The binding is tight and there are no gaps. It looks really good up close. I'm excited to finish it off with some 320 grit and then finish sanding the recurve. Here's another video:
 March 1, 2009
Binding Part 2
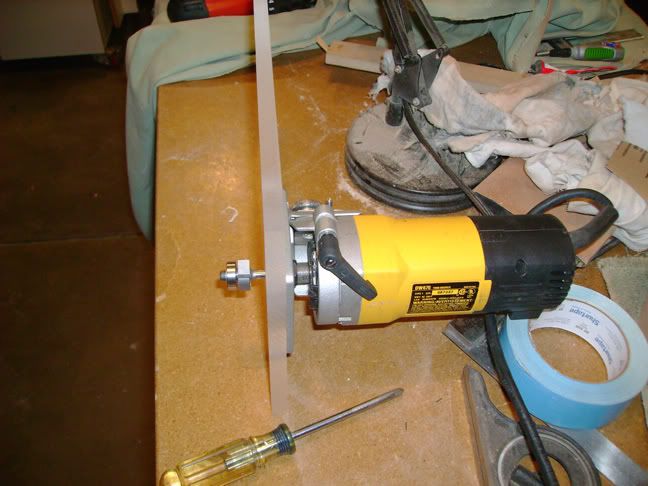
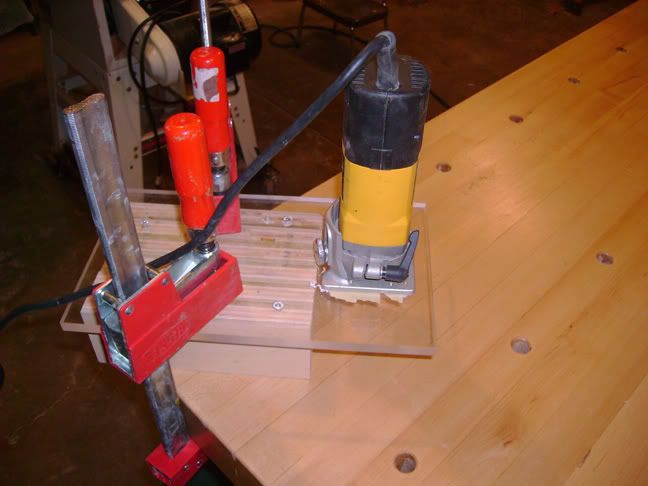
Last post I detailed my problems with installing the binding. Yesterday I started building a jig to recut the channel. Here are a few pics of what I came up with.I started off with a decent sized piece of 1/2" acrylic and mounted my laminate trimmer to it. A laminate trimmer is simply a lightweight router that is good for jobs that aren't too heavy duty.
I cut some strips of some really crappy 1" plywood with cabinet grade facing and glued them together. They provide the base for the acrylic plate. I then attached the acrylic plate to the glued together boards. I secured my new jig to the worktable with a couple of clamps and this is what I ended up with:
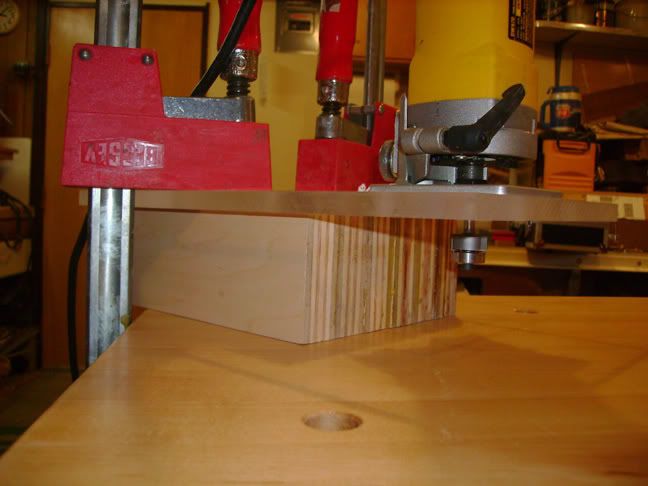
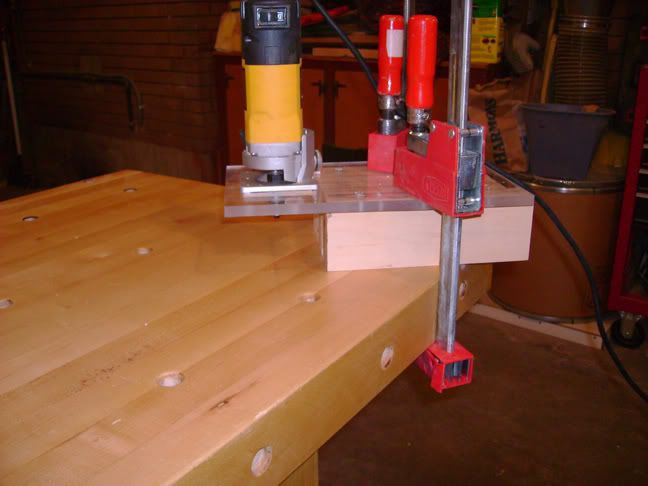
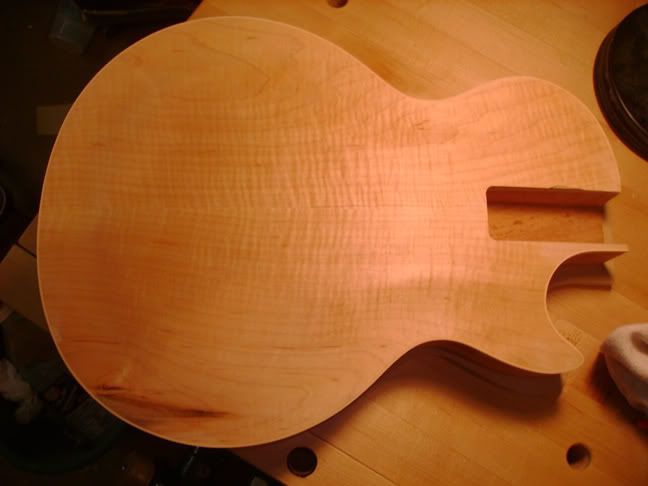
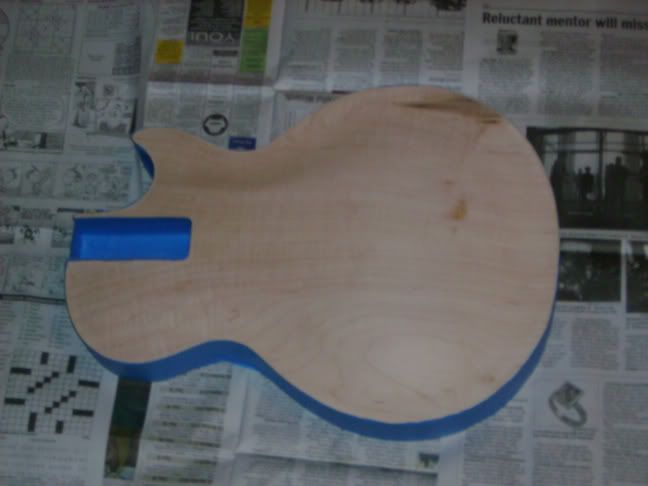
The only problem is that the laminate trimmer wouldn't let the router bit go low enough. I solved the problem by placing the body on one of my router templates which added 1/2". I checked the height of the bit against the body and noticed that things weren't entirely even. The problem was that the bottom of my guitar wasn't perfectly flat. To fix this I took three strips of 120 grit sandpaper with adhesive backing and stuck it to the table.
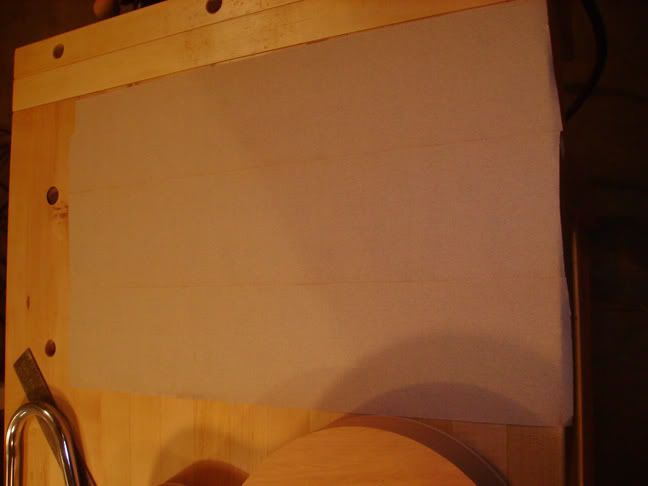
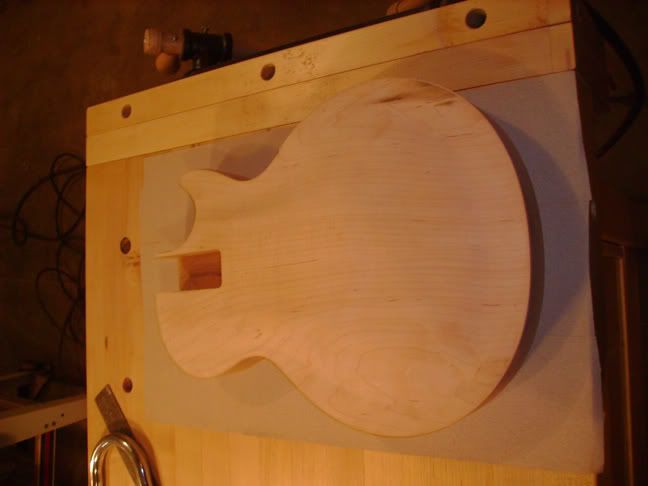
I then used a pencil and drew a bunch of squiggly lines across the back. This will help me know when the job is done because the pencil lines will disappear as the body is sanded flat. Finally I placed the body on the sandpaper and moved it back and forth across the sandpaper.
A vid to give you a better idea:
This worked great and soon the bottom was flat. I rechecked the body against the router bit for any height problems and everything checked out.I made a few test cuts on scrap and noticed that the StewMac binding router bit with a .060 bit cut the channel right around .0705. The catalog says the bit adds .012 to compensate for glue and wood expansion. When I held the .060 binding (which is slightly larger than .060) in the channel I noticed it was smaller than the channel. I'm sceptical that the glue and wood expansion will take up the extra room but we shall see.
It was time to see if my new binding routing jig worked. Instead of photos lets try another video. Remember I was routing the old binding away while creating a new channel.
I felt I needed to explain a few more things so here's another vid:

I cut some strips of some really crappy 1" plywood with cabinet grade facing and glued them together. They provide the base for the acrylic plate. I then attached the acrylic plate to the glued together boards. I secured my new jig to the worktable with a couple of clamps and this is what I ended up with:


The only problem is that the laminate trimmer wouldn't let the router bit go low enough. I solved the problem by placing the body on one of my router templates which added 1/2". I checked the height of the bit against the body and noticed that things weren't entirely even. The problem was that the bottom of my guitar wasn't perfectly flat. To fix this I took three strips of 120 grit sandpaper with adhesive backing and stuck it to the table.

I then used a pencil and drew a bunch of squiggly lines across the back. This will help me know when the job is done because the pencil lines will disappear as the body is sanded flat. Finally I placed the body on the sandpaper and moved it back and forth across the sandpaper.

A vid to give you a better idea:
This worked great and soon the bottom was flat. I rechecked the body against the router bit for any height problems and everything checked out.I made a few test cuts on scrap and noticed that the StewMac binding router bit with a .060 bit cut the channel right around .0705. The catalog says the bit adds .012 to compensate for glue and wood expansion. When I held the .060 binding (which is slightly larger than .060) in the channel I noticed it was smaller than the channel. I'm sceptical that the glue and wood expansion will take up the extra room but we shall see.
It was time to see if my new binding routing jig worked. Instead of photos lets try another video. Remember I was routing the old binding away while creating a new channel.
I felt I needed to explain a few more things so here's another vid:
February 28, 2009
Binding
I was feeling good about the carved top of my guitar. However, the feeling was shortlived.
So what is binding? Binding is a trim that goes around the outer edge of the guitar. It serves an asthetic purpose but also helps protect the edge of the guitar. Binding can be made from all kinds of different things ranging from cellulose to plastic. Not all guitars have binding. The '59 Gibson Les Paul has binding around the top of the guitar body and the sides of the fingerboard.
I had alread routed the binding channel using a 1/2" flush trim bit with a 3/8" bearing. This produced a channel that was supposed to be about 1/16" or .060" if you prefer decimals.
I purchased cream .090" binding from Stew Mac. The binding is made of ABS plastic.
I started by trimming the binding so that it was about 1/8" taller than the top of the channel. It was necessary to leave the binding a little taller on the inside of the horn because of the transition of the carve in that area.
I started by using Weld On brand glue that is supposed to be the best choice for gluing the binding in the channel. My method was to spread glue on about three inches of the channel and then seat the binding in the channel. I held the binding flush with my fingers until the glue started to tack up. I then used special tape to hold the binding tightly against the body while the glue dried. I used a ten dollar Harbor Freight heat gun to bend the binding around the curves of the guitar. The heat gun is really cheap and is really just a blow dryer on steroids.
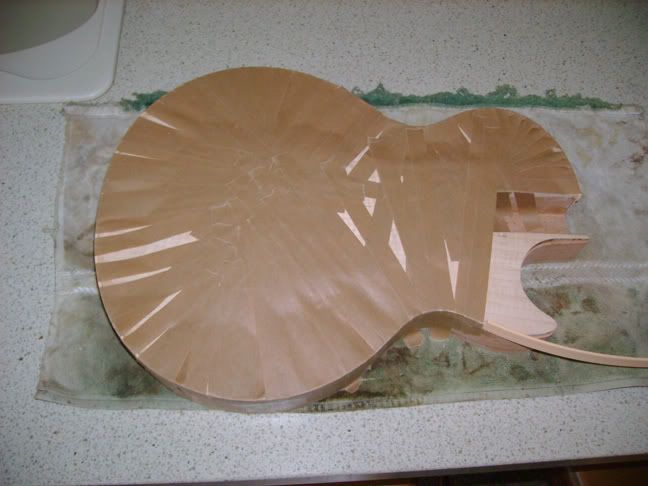
My plan was to glue the binding up to the horn and then leave it and do the horn the next day. This is a prefered method of many luthiers because the horn is the most difficult area to bind.
The process was sloppy and I had glue all over my fingers. Even worse it got all over the sleeves of my new hoody. Nope the glue didn't come out so now the hoody is only worn when I'm puttering around the garage.
Gluing the binding is difficult. I was fortunate that my dad came out and gave me a hand. Once he joined in the job went pretty fast.
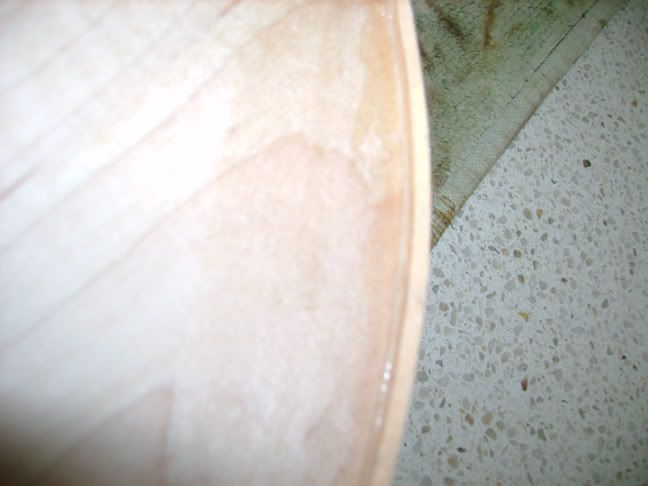
As I stated above the binding is .090" wide while the channel is .060" wide. This means that the binding must be scraped flush with the body. I also stated that the binding is taller than the channel so the top portion must be scraped down as well. Even though I hadn't yet glued the binding around the horn I decided to sand and scrape some of the binding I had done flush with the guitar just to see how things looked. I proceeded to sand the binding flush on the outside and then scraped it flush on the top. as I looked things over I noticed that in many areas the binding had been sanded too thin and wasn't conisistent all the way around the guitar. This really bugged me and I couldn't understand why there was a discrepency. I pulled out my digital caliper that has a depth gauge and measured the channel in various places on the part of the guitar that hadn't yet been bound. It turns out that the channel ranged from .060" to .073" thick depending on where you took the measurement.
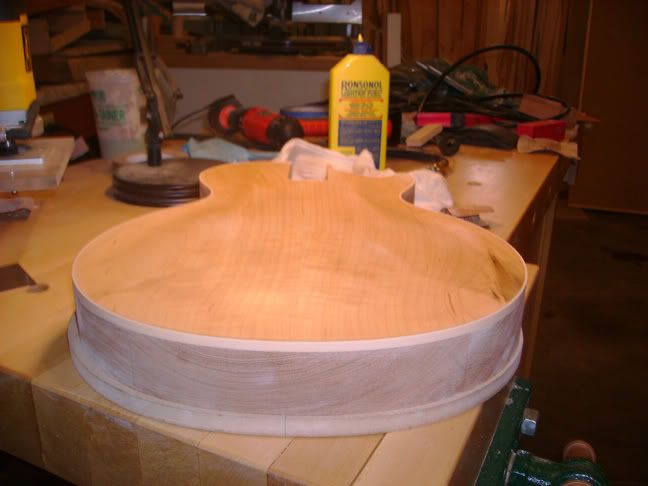
It was very difficult to photograph the flaw. This pic came out ok and you can see how the width of the binding fluctuates as it bends around the waist of the guitar.
To be honest the inconsistency bugged me. I had spent all this time working and making everything as nice as I could only to botch the binding job. I think the channel became inconsistent because I routed it prior to carving the top. Over time I think it changed as I lightly sanded around the guitar.
I'm not going to lie, this flaw will probably drive me nuts. My options are the following:
1. Don't worry about it and this guitar becomes a "players guitar".
2. Route out the old binding and start again.
I chose number two.
To be continued........
So what is binding? Binding is a trim that goes around the outer edge of the guitar. It serves an asthetic purpose but also helps protect the edge of the guitar. Binding can be made from all kinds of different things ranging from cellulose to plastic. Not all guitars have binding. The '59 Gibson Les Paul has binding around the top of the guitar body and the sides of the fingerboard.
I had alread routed the binding channel using a 1/2" flush trim bit with a 3/8" bearing. This produced a channel that was supposed to be about 1/16" or .060" if you prefer decimals.
I purchased cream .090" binding from Stew Mac. The binding is made of ABS plastic.
I started by trimming the binding so that it was about 1/8" taller than the top of the channel. It was necessary to leave the binding a little taller on the inside of the horn because of the transition of the carve in that area.
I started by using Weld On brand glue that is supposed to be the best choice for gluing the binding in the channel. My method was to spread glue on about three inches of the channel and then seat the binding in the channel. I held the binding flush with my fingers until the glue started to tack up. I then used special tape to hold the binding tightly against the body while the glue dried. I used a ten dollar Harbor Freight heat gun to bend the binding around the curves of the guitar. The heat gun is really cheap and is really just a blow dryer on steroids.

My plan was to glue the binding up to the horn and then leave it and do the horn the next day. This is a prefered method of many luthiers because the horn is the most difficult area to bind.
The process was sloppy and I had glue all over my fingers. Even worse it got all over the sleeves of my new hoody. Nope the glue didn't come out so now the hoody is only worn when I'm puttering around the garage.
Gluing the binding is difficult. I was fortunate that my dad came out and gave me a hand. Once he joined in the job went pretty fast.


As I stated above the binding is .090" wide while the channel is .060" wide. This means that the binding must be scraped flush with the body. I also stated that the binding is taller than the channel so the top portion must be scraped down as well. Even though I hadn't yet glued the binding around the horn I decided to sand and scrape some of the binding I had done flush with the guitar just to see how things looked. I proceeded to sand the binding flush on the outside and then scraped it flush on the top. as I looked things over I noticed that in many areas the binding had been sanded too thin and wasn't conisistent all the way around the guitar. This really bugged me and I couldn't understand why there was a discrepency. I pulled out my digital caliper that has a depth gauge and measured the channel in various places on the part of the guitar that hadn't yet been bound. It turns out that the channel ranged from .060" to .073" thick depending on where you took the measurement.
It was very difficult to photograph the flaw. This pic came out ok and you can see how the width of the binding fluctuates as it bends around the waist of the guitar.

To be honest the inconsistency bugged me. I had spent all this time working and making everything as nice as I could only to botch the binding job. I think the channel became inconsistent because I routed it prior to carving the top. Over time I think it changed as I lightly sanded around the guitar.
I'm not going to lie, this flaw will probably drive me nuts. My options are the following:
1. Don't worry about it and this guitar becomes a "players guitar".
2. Route out the old binding and start again.
I chose number two.
To be continued........
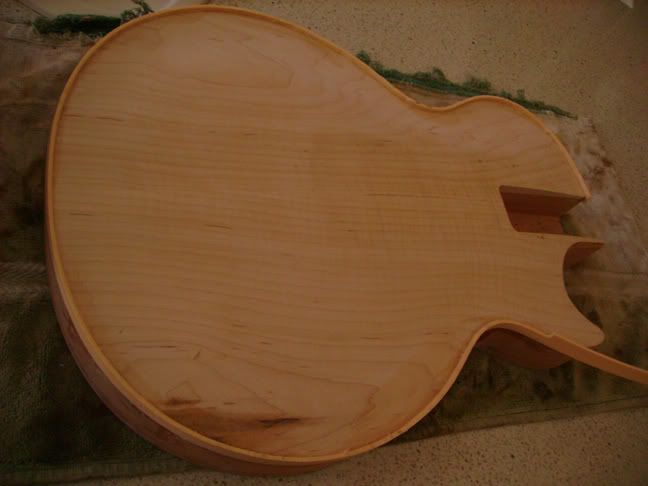
More Pics
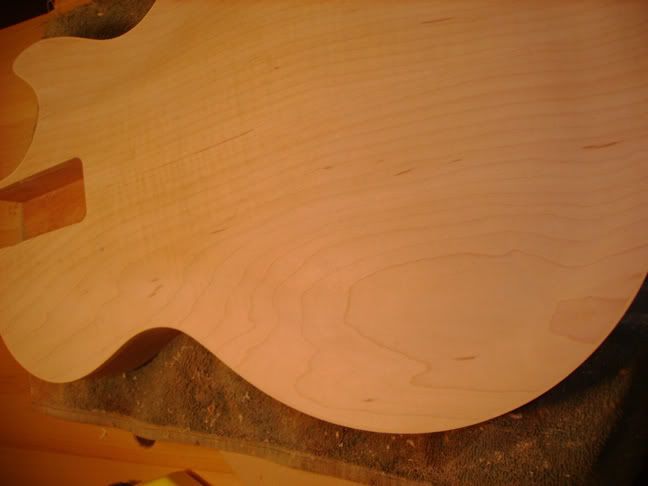
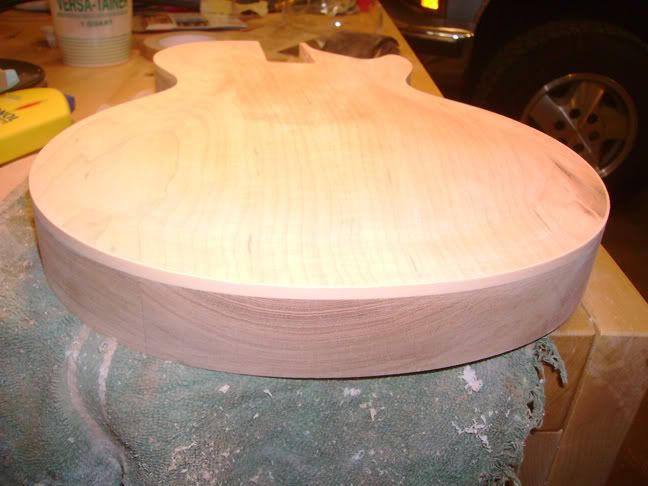
This is as far as I want to go on the top carve until the binding is in place. I have been comparing it to my buddy Jack's Gibson Les Paul R8 and it's as close as I can get it. I still have some work to do on the recurve and final sanding but that, as stated above, will wait until I've glued the binding on.
Just for kicks I put my the fingerboard I ruined on top just to see how things look. There is also a pic of my new board. Let me know how I did.
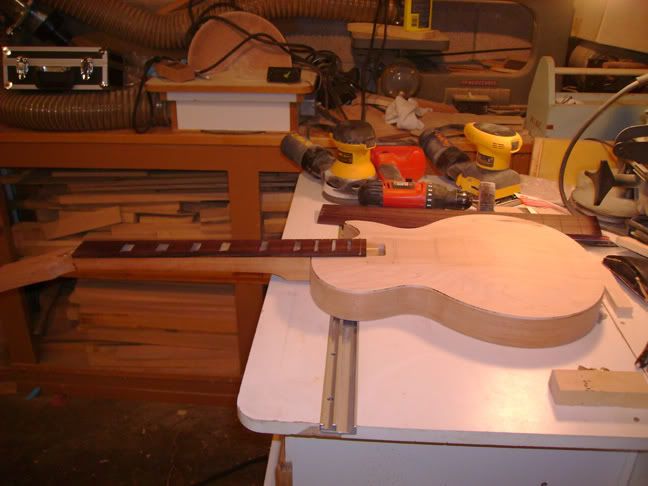

Just for kicks I put my the fingerboard I ruined on top just to see how things look. There is also a pic of my new board. Let me know how I did.


February 23, 2009
I need to update: More On Top Carving
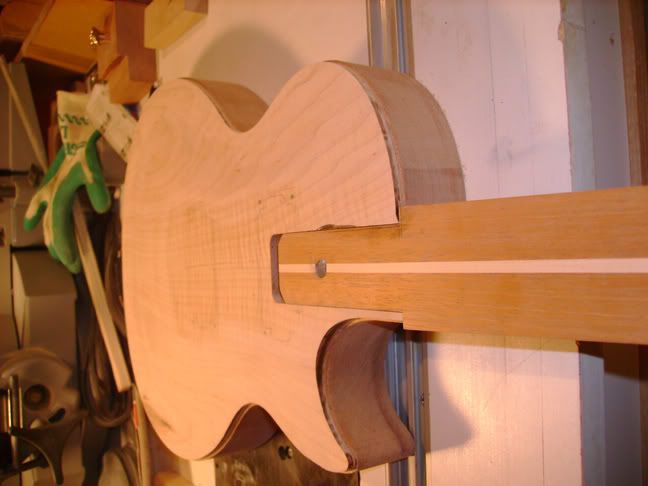
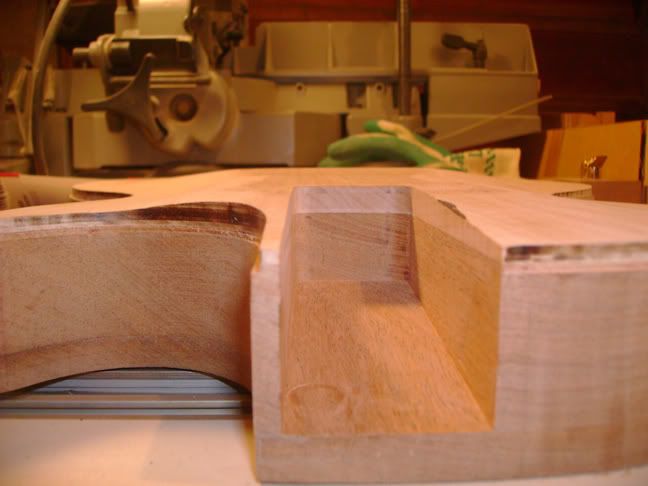
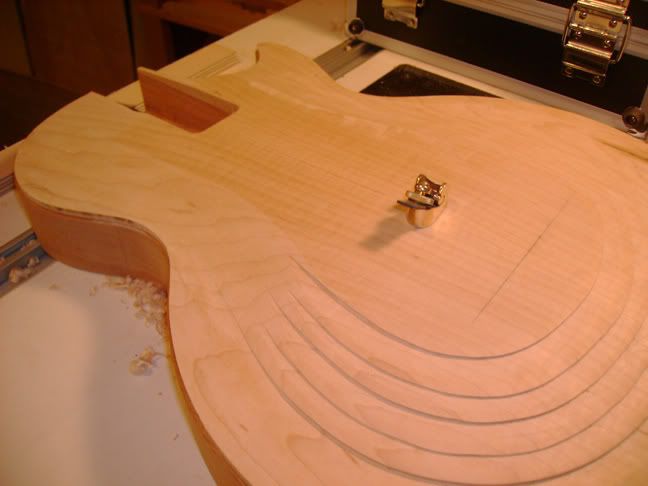
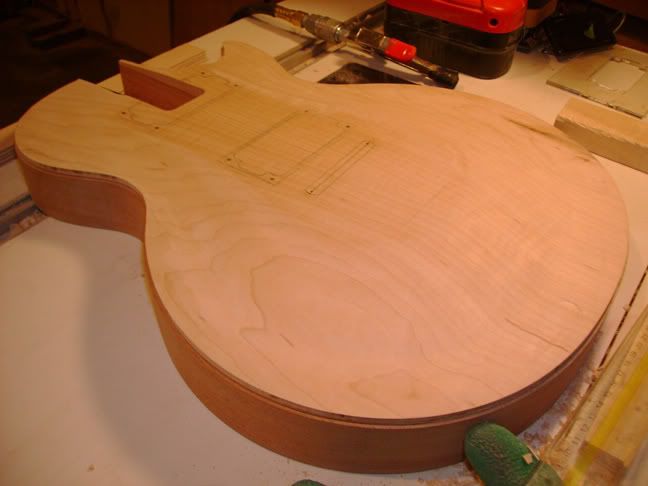
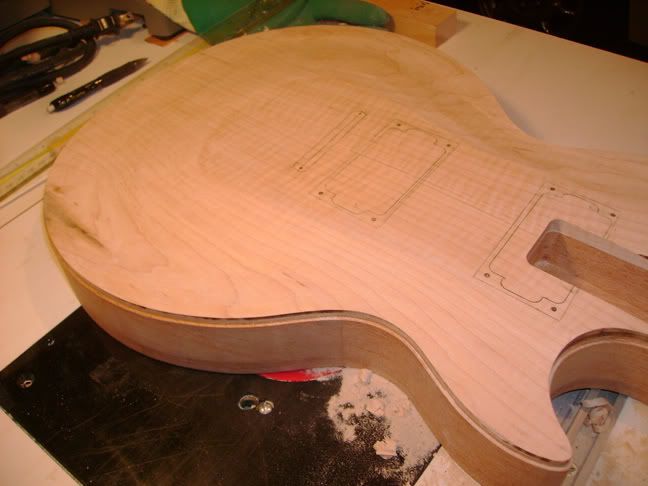
Sorry folks I've had some schedule changes at work that are kicking my butt and updating the blog has been difficult. Not to worry the guitar has actually progressed quite a bit. I'm going to try and get everything up to date this week starting with this post. I cut the pickup plane angle. When it was all said and done it ended up being around two degrees. I messed up and started the cut about an eight of an inch on the wrong side of where the neck ends. I'll clean it up when I finish the carve. The carve is coming along nicely. I've been using a combination of my finger plane and flap sanding wheel that fits on my power drill. I've been roughing things out with the plane and then cleaning it up with the flap sander. So far so good. I'm going to carve the rear last. I need to map out the bridge better. If there was one thing I would change about my topography on my template it would be to make the steps in the rear close to the tailpice. As it stands now I'm going to have to use and rasp or something to rough out the back because the steps are too far from where they should be. Here are a few pics of where I am so far: 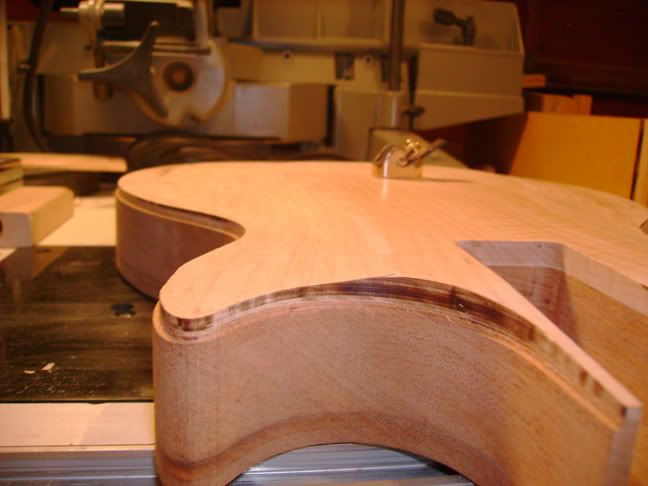
 Don't you just love that cute little finger plane? I shot some videos of the carving so you can see how the work is being done. They are long and probably boring but some of you will find them interesting. Please excuse the quality. I do not have a regular video camera and have been using my point and shoot on video mode. It's also obvious that I'll never be a news anchor.
In this one I just carve away. I also show where I'm at at the end.
Another quick vid. I'm actually much further along than this.
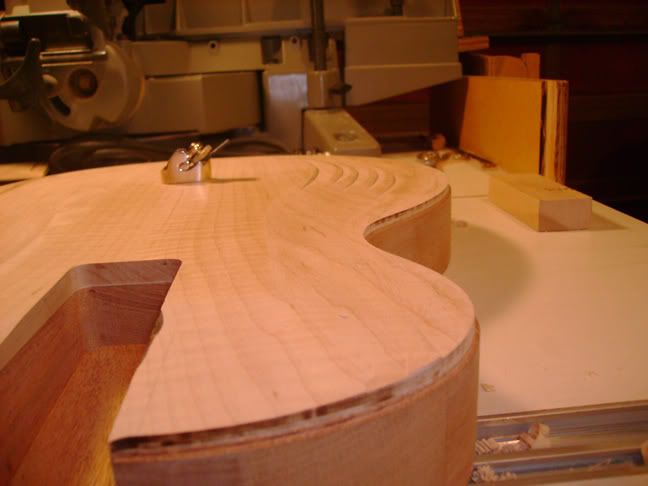
Here are a couple more pics of the carve: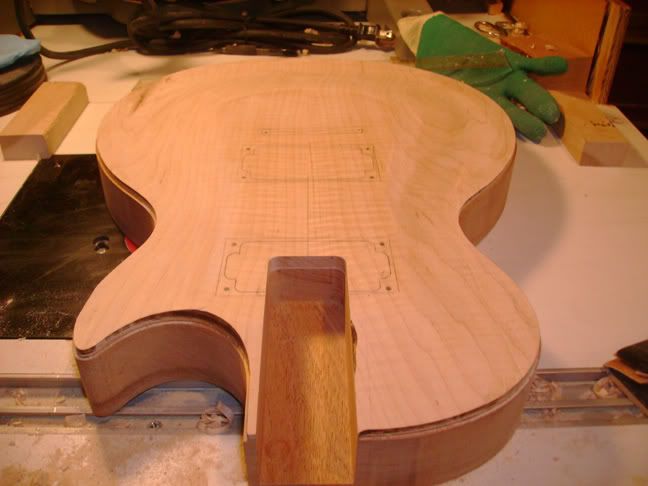
 I'm very happy with the progress of the carve. It has been difficult but I'm comfortable with the decision to carve the top by hand rather than with a duplicarver. It has been a very educational experience. This week the updates should come pretty quickly as I try to get caught up so pay attention or you will get behind.


 Don't you just love that cute little finger plane? I shot some videos of the carving so you can see how the work is being done. They are long and probably boring but some of you will find them interesting. Please excuse the quality. I do not have a regular video camera and have been using my point and shoot on video mode. It's also obvious that I'll never be a news anchor.
In this one I just carve away. I also show where I'm at at the end.
Another quick vid. I'm actually much further along than this.
Here are a couple more pics of the carve:


 I'm very happy with the progress of the carve. It has been difficult but I'm comfortable with the decision to carve the top by hand rather than with a duplicarver. It has been a very educational experience. This week the updates should come pretty quickly as I try to get caught up so pay attention or you will get behind.
Subscribe to:
Posts (Atom)