I proceeded to plane the holly down using the same DeWalt planer I used for the body wood. The very lowest setting of the planer actually got the wood to around 3/32" thick. I then cut off a rectangular piece and traced the outline of the headstock shape. Then I used my Dremel to cut out the truss rod adjustment hole. I then lined up the holly on top of the peghead and glued it on. After the glue was dry I used my template routing bit to cut the overlay flush with the peghead. This is what I was left with:
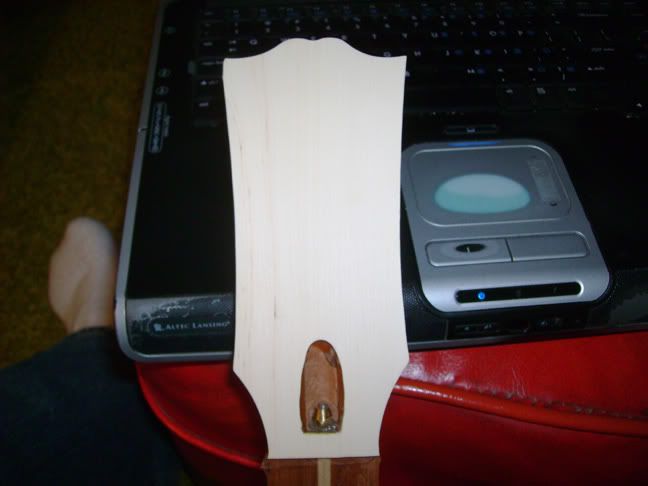
Everything seemed to have gone well but upon closer inspection I spotted a flaw. Can you see it?
If you look at the top right wing of the overlay you will notice that the pointy part is screwed up. This becomes apparent when you compare it with the other side. This flaw made me sick. It turns out the peghead beneath the holly was flawed before I ever glued on the overlay. Because of the color of the mahogany the flaw was hard to spot. I inspected the template I used to cut the peghead shape and found the problem. Somehow the template was damaged so the flaw in it was transfered to the peghead and then to the peghead overlay.
I had three choices to fix the problem:
1. Make a different neck and use the flawed neck for something else.
2. Alter the shape of the headstock into something that looked cool and hid the flaw.
3. Grind off the holly overlay, cut of the wings I'd glued on the headstock, and start over again reshaping the headstock.
I was leaning toward option number two and started mocking up some options for reshaping the peghead. Here are some examples:
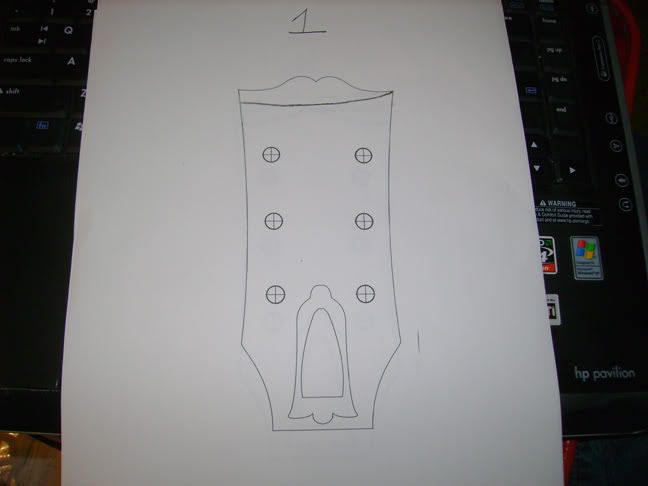
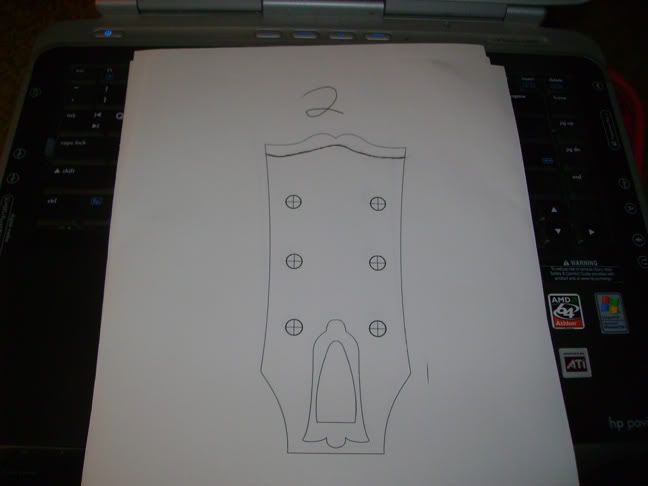
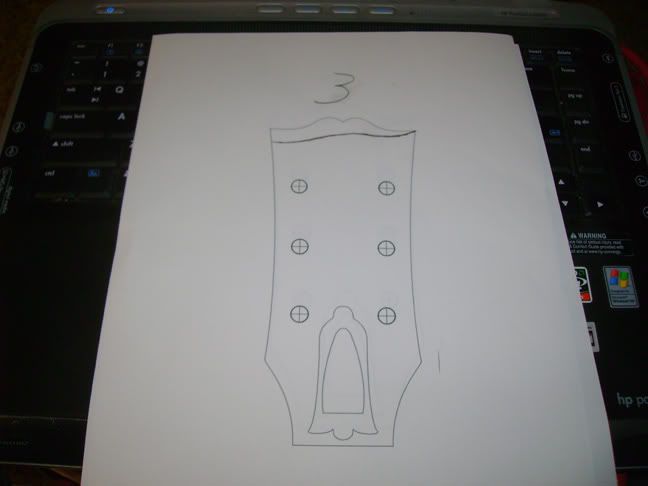
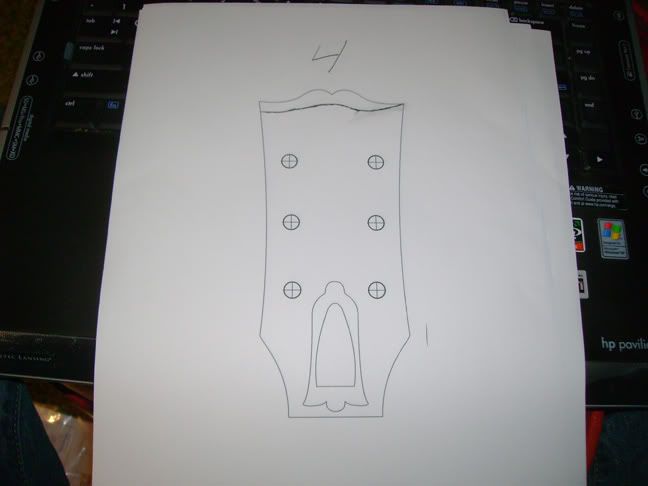
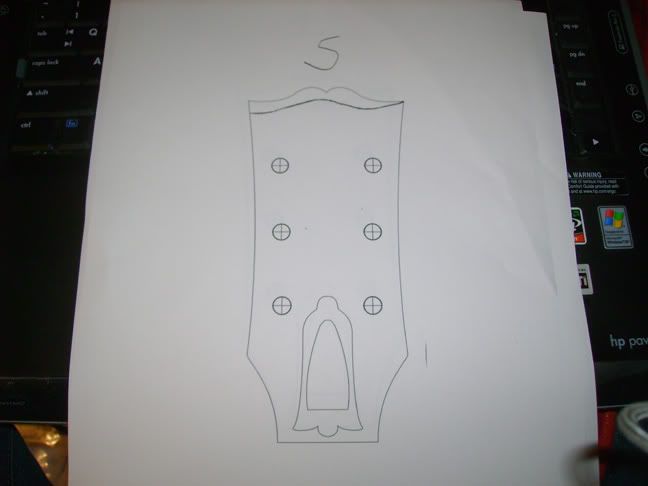
My favorite was option number five. The downside is that it looked a bit like the ESP brand's peghead.
Reshaping the peghead has one other disadvantage, the peghead no longer looks like a classic Les Paul shape. To be honest this really didn't bother me as I wanted to personalize the guitar somehow and a new peghead shape would accomplish that task. Still, I was torn between wanting the classic Les Paul shape and something new. My inability to decide between the two shapes delayed the build of this guitar for a couple of months.
Finally I decided that when in doubt go with the original idea. I ground off the holly overlay, cut off the wings, glued on new wings, made a new headstock template without the flaw, cut out the peghead with the new template, made a new piece of holly, cut out the truss rod access hole, glued on the overlay, and finally cut out the shape of the overlay.
Here's the new peghead:
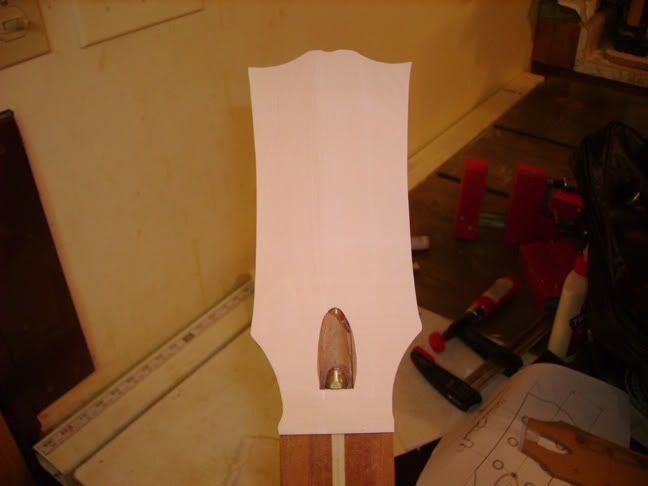
I have cleaned up the overlay a bit and it looks great. I planed the overlay down to 1/16". I also started to plane down the back of the headstock to thickness using the oscillating spindle sander. My new Kluson tuners arrived so I will be drilling the tuner holes this week. The top middle part of the headstock still needs a little carving because the router will not quite finish off the intricate shape.
Remember how I screwed up my first fretboard? This week I will be inlaying the new fretboard and hopefully cutting the taper, fretting, and installing the binding. I'm hoping to have this guitar ready for finish in the next couple of weeks because I need it for a gig in August.
1 comment:
You made the right decision to go back and fix the problem. It wouldn't look right without the classic Les Paul head shape. Well done for sticking to the plan.
Post a Comment