The '59 Les Paul uses a mortice/tenon system for attaching the neck to the body of the guitar. One of the key differences between a vintage Les Paul and a modern version is the tenon. The vintage Les Paul uses a long tenon design that extends into the hole that's routed for the neck pickup. The new Les Pauls use a much shorter tenon. The long tenon is thought to sound better but the short tenon is cheaper to manufacture. Way to cater to the accountants Gibson.
The mortice an tenon have a male/female type of relationship. The tenon is the male and the mortice is the female. What happens is you slide the tenon of the neck into the....
Awe crap this is getting sexual. I'll just show you.
In order to carve the mortice in the body you need a template. This time I chose to make my template out of clear acrylic. I took a rectangular piece of acrylic and used a utility knife to score a line down the center. Then I measured out the length and width of the tenon and scored that with the knife as well. Then I took three small very straight pieces of acrylic and glued them on the lines I scored. These straight pieces of acrylic serve as the router guides for cutting the template.
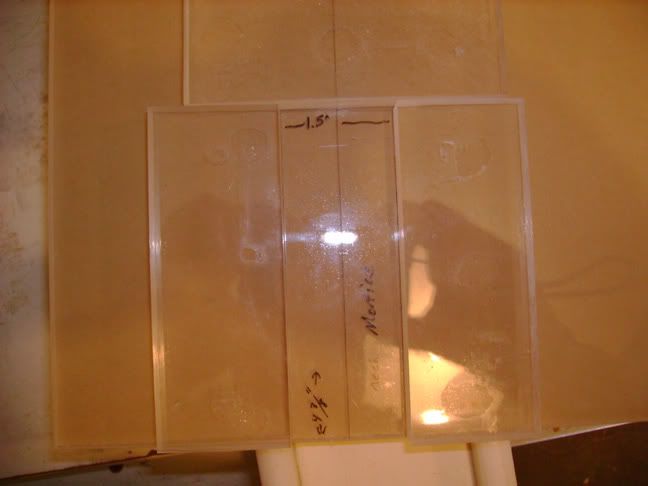
The brown stuff on the bottom of the acrylic is actually a protective backing that you peel away.
Here's the piece routed with the backing still on:
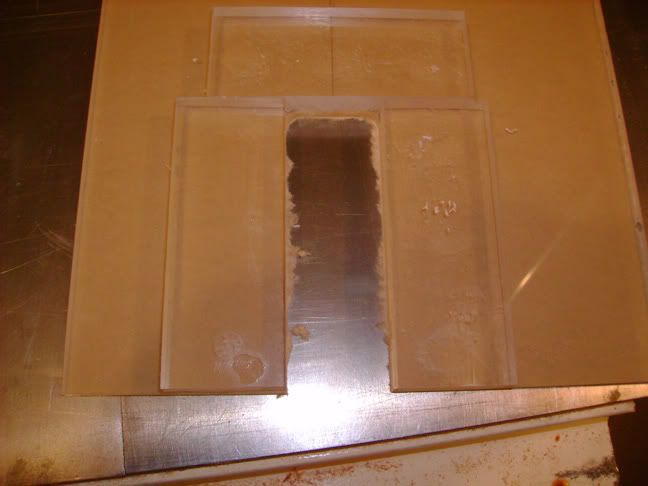
And here's the finished template:
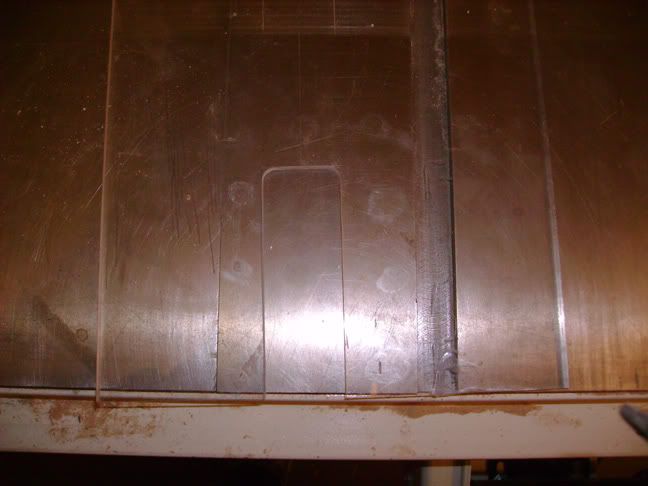
Remember the neck angle I cut in the body? The mortice template is attached to the body with double sided tape on the part where the angle is cut. The centerline I scored on the template lines up with the centerline of the body. The centerline ensures that the route is perfectly aligned. The mortice is 1.5 inches wide so I used a 1 3/8 inch forstner bit on my hand drill to hog out some of the material. This saves the router blades some stress.
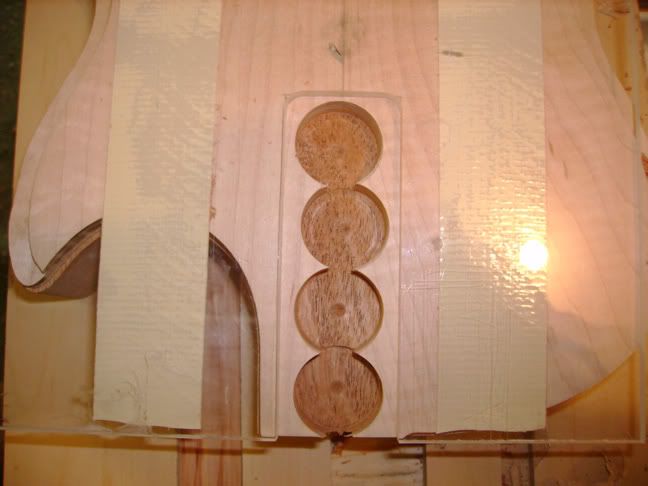
To finish the cut out comes the router with a template cutting bit. You align the bearing on the template and proceed to cut out the mortice. I took out about an eighth of an inch worth of material with each pass.
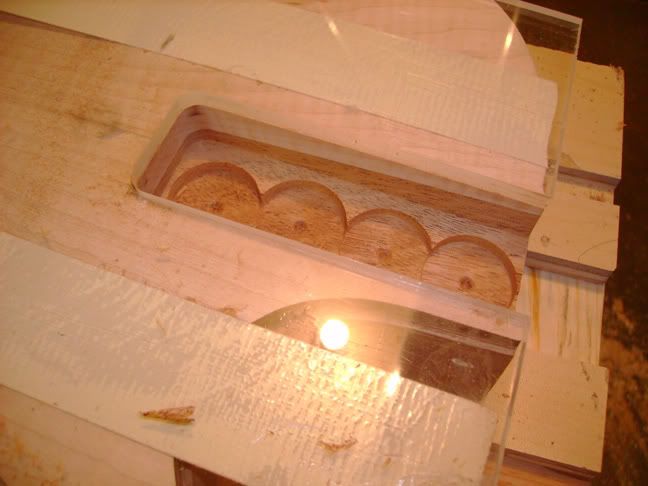
After I got down far enough I was able to remove the acrylic mortice template and just use the actual mortice as the template. I did have one problem. The depth of the cut is 1.5 inches but my bit was only an half of an inch. Even with my router set at the lowest depth I couldn't route far enough down. The nearest place that sells router bits is Sears at Fashion Place mall. I know I know, Sears has a bit of a reputation. I picked up an inch long template router bit at Sears that actually worked very well and was just as good of quality as my more expensive bits. Yaaaaaay!
So I routed down to the depth of 1.5 inches. The mortice looked perfect but as I ran my hand along the sides at the spot where my smaller bit started to become inadequate I noticed some slight wavyness to the cut. The reason for the waves is I pulled the half inch bit as far out of the router collet (a collet is the part of the router that grips the bit and holds it in place) as I dared but in doing so the bit developed a slight wobble. Let this be a lesson to you would be woodworkers that you need to have more than a quarter inch of your bit's shank in the collet.
To fix the problem I put the smaller bit back in the router and started trueing up the route above the waves so the bearing would be able to ride on the perfectly routed upperThe portion of the mortice. This is when the router broke. Most routers have a dial that can be used to lower the bit when you are trying to increase the depth of cut. When I was tightening the bolt that secures this dial the assembly broke. It's ok because I also have access to a really nice DeWalt router.
The problem with switching routers at this time is that I was unfamiliar with all the adjustments of the DeWalt. I loaded the shorter bit in the DeWalt thinking I'd go down as far as I could with the shorter bit and then switch to the longer. Being unfamiliar with the DeWalt I accidently lowered the collet of the router lower than the actual router base. The result of this error was I started routing and then smelled something burning. I had a momentary brain fart and went down both sides of the mortice before I looked to see what exactly the problem was. The stupid collet (actually I shouldn't blame the collet I should blame myself) had dug into the top side of the mortice and made some ugly, burned looking, gouges in the top of the mortice.
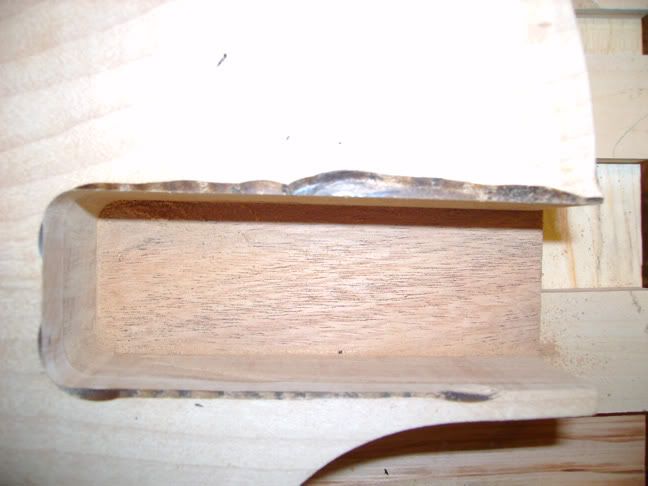
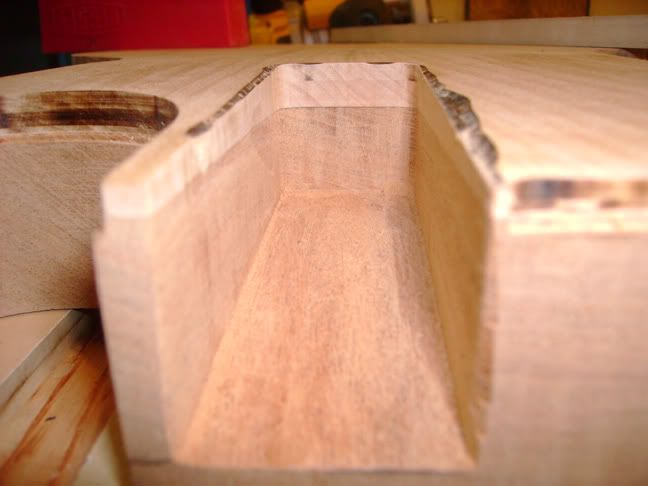
I'm not even going to start on the words that I uttered when I saw the damage. In fact I'm pretty sure I invented some clever epithets as a result of my stupidity. As I inspected the rest of the mortice I noticed that when I'd pulled the router out I gouged one side a little bit about an inch down. This had officially become a bad day.
There is good news. The errors mean exactly nothing to how the finish product looks and plays. The burned gouges along the top edge will disappear under the fingerboard when it's glued on. I will correct the slight gouge in the inner part of the mortice by simply routing the mortice 1/32" wider on each side and making the tenon of the neck slightly wider to match. While this isn't perfect to the '59 Les Paul spec it is workable. Actually the specs of a '59 Les Paul vary slightly from guitar to guitar so it wouldn't surprise me if some of the mortice and tenons on those guitars were slightly wider than the norm.
When it's all said and done I can live with the result. The only disappointing thing is that everything had gone perfectly with the body up until this point and now it wasn't perfect. However if I sold you the guitar without you seeing how it was built you would never know that I'd made a mistake.
2 comments:
I'm no longer interested in purchasing this guitar.
If I knock a grand off the $20k purchase price would you reconsider? hahaha
Post a Comment