Prior to the start of this project I ordered a neck blank from Stewart Mac and rough cut a neck out of it. When cutting out the blank I made rookie mistake. I figured I'd make my first cut with a table saw. This cut would be on the underneath portion of the neck and extend from the tenon all the way to the bottom of the headstock. I started cutting on the tenon side of the neck and stopped about an inch and a half from the back of the headstock. Then I took the neck over to the bandsaw to trim the rest.
As I trimmed out the back of the headstock with the bandsaw I noticed there was a big notch cut out of the back of the headstock. My big mistake when making the cut with the table saw was not stopping a few inches behind the headstock. The problem is I was seeing the blade of the table saw from the top which stopped well behind the back of the headstock. However the blade is circular and the part of the blade you can't see actually sticks out further. It was the part of the blade that I couldn't see that bored into the back of the headstock and left the notch.
All was not lost. I had just enough room on the neck blank to redraw the neck and cut it again. I just moved everything back about an inch. This gave the new back of the headstock just enough room to miss the notch. I had to compromise during the redraw to miss the notch so the headstock is about 1 1/8" thinner than is specified in the plans.
Fast forward to the middle of December. I have been struggling with some of the procedures I need to perform in order to build the neck. One of those is how to carve a curved truss rod channel. I'll cover how I'm going to do this in the next blog post. I'd settled on a plan and needed a maple board in order to make it work so I headed to my local hardwoods emporium. Just for kicks I asked the guy if he had any quartersawn mahogany around that was big enough to construct a neck blank. We went over to the mahogany and found a great board that was big enough to construct three necks. I bought it along with the maple. I went home and got to work and this is the result:
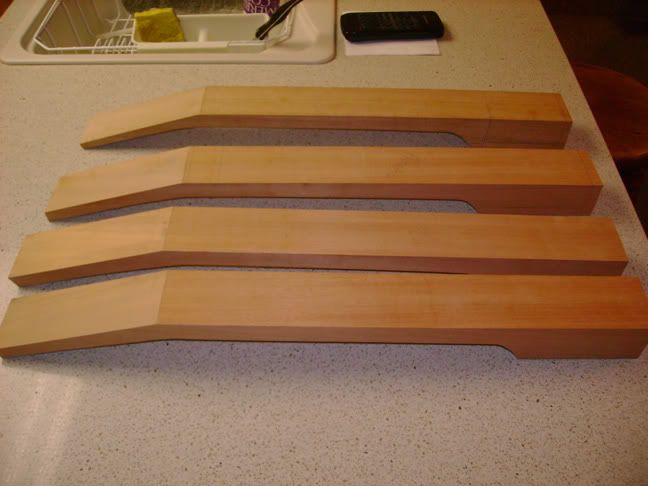
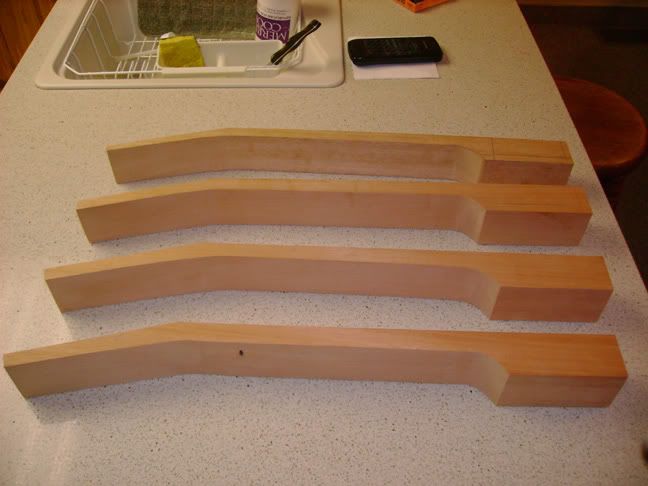
Yup, three new necks! The top neck is the original. Notice how the headstock (the short part that is angled) is thinner than the others. The neck is usable but not for the guitar I'm' building. I have something else in mind for the original neck.
So what am I going to do with the other three necks? One will go on the guitar I've been writing about. I haven't decided what the other two will go on but I'm thinking a Les Paul with a quilted maple translucent blue top and a Les Paul Custom with a Bigsby vibrato. Anyone have any ideas?
My camera ran out of batteries so I can't show the steps for roughing out the neck. I will give a brief description how it's done.
The first thing you want to do is true up the blank. This means making sure that it is square. I did this with a table saw and a jointer. I then inspected the blank so I could avoid any worm holes or other problems with the wood. Once I'd decided which side of the blank would be the fretboard side I began to draw the profile of the neck on the blank. This is done with careful measurements and a protractor. The protractor is used to draw the angle of the headstock and also the angle where the neck meets the body.
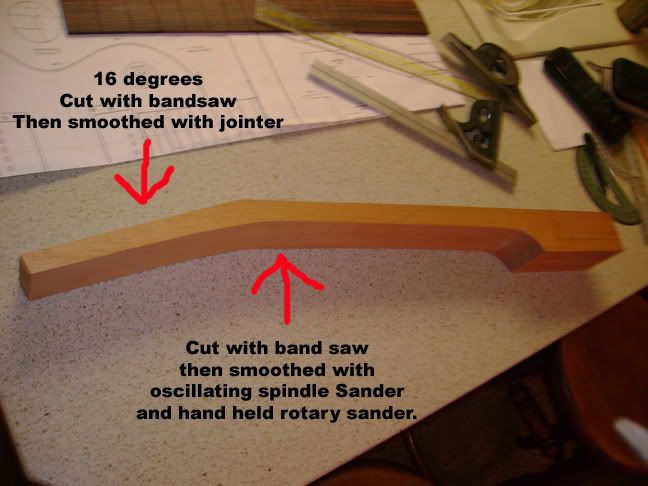
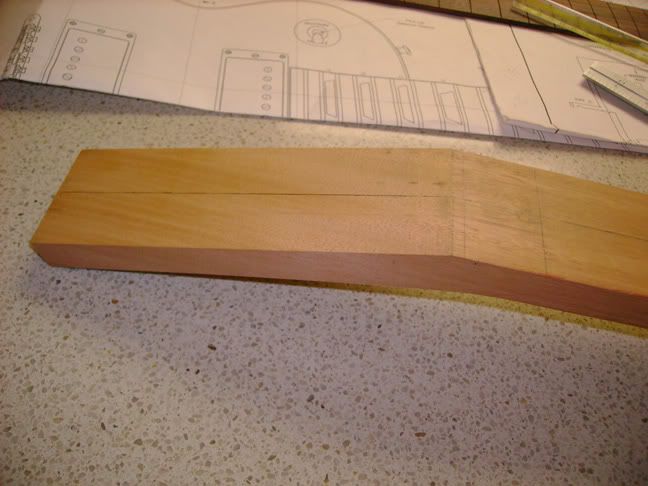
This time I rough cut all the necks with a bandsaw. Of course I can't cut perfectly straight with a bandsaw so the wood was a bit jagged along the cut. It occured to me that I could even out the top of the headstock with the jointer. In checking out the builds of others I've never seen it done this way so it was a risk. The risk paid off and I got a perfectly flat and smooth surface that didn't need any sanding. For any that may try this technique make sure you run the nut side of the headstock through the jointer first. If you run the tip through first you could experience tearout. Here's a pic of the top of one of the headstocks.
As noted in the picture I used an oscillating spindle sander to sand out the jagged stuff on the back of the neck. I finished up with a rotary sander.
Once the necks are roughed out you want to mark out the centerline and the places where the tenon will be cut.
Marking the centerline is easy. You just measure the width of the neck and then use a t-square to draw the line.
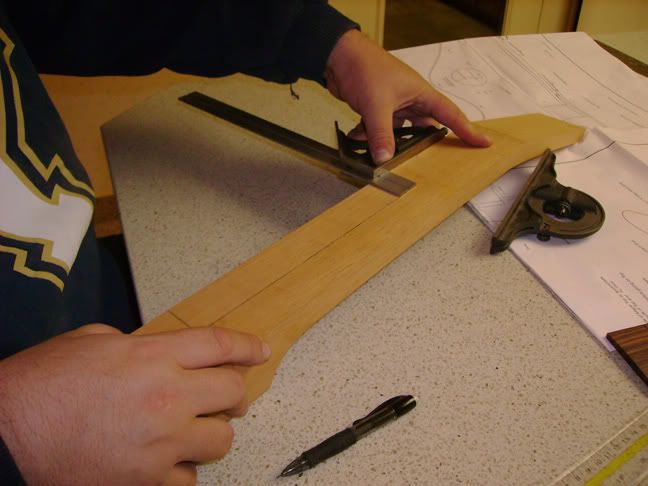
Marking the tenon is more difficult. You still remember what a tenon is right? The tenon is what fits into the mortice we already cut in the guitar body.
The tenon measurements must be exact or the neck will not fit properly into the body. The key is to make sure the centerlines of both the neck and the body match. For the top of the tenon you base all of your measurements off the centerline. The lines going across the width of the neck represent frets. The lines running the length of the neck represent the tenon and the wood outside of them will be removed.
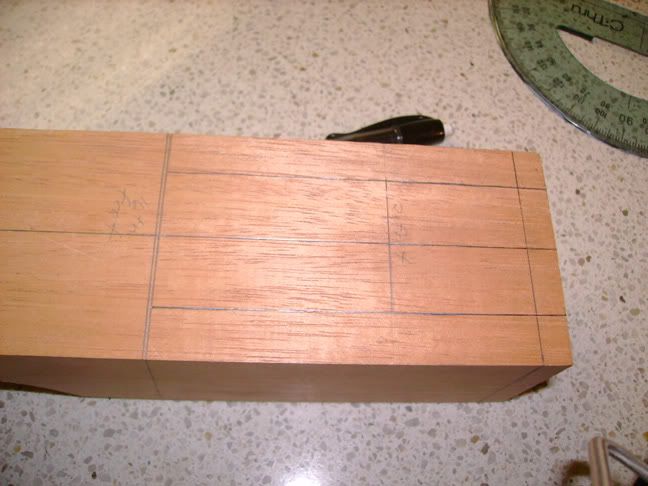
The neck meets the body at the front of the sixteenth fret. There are two lines drawn here. The one on the left is the actual fret dead center. The one on the right represents the front edge of the fret which is where the neck meets the body.
This side view represents the profile of the tenon. Remember my routing the body four degrees to accomodate the angle of the neck? If you look at the profile lines of this neck you will notice that the same four degree angle is incorporated into the neck where it meets the body.
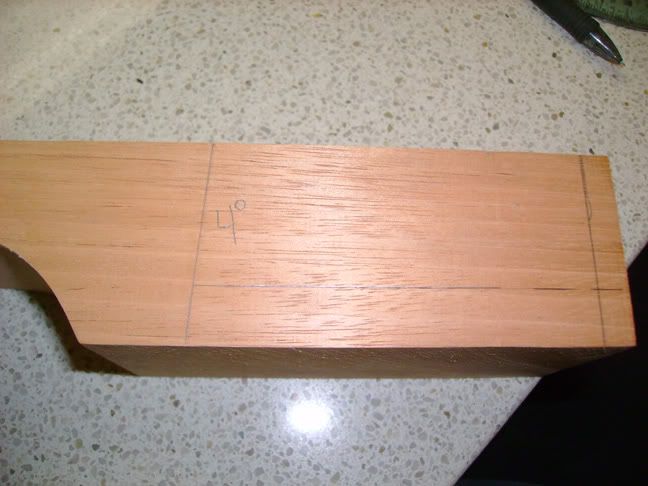
The line on bottom represents the bottom of the tenon and the line at the end represents where the tenon ends.
So why didn't I cut the tenon? It's simple. I need the side of the neck to be flat along its full length to cut the curved truss rod channel. Tomorrow I will build the jig to make this cut. I'm also waiting for a part I need for the router bit. The part should be here on Tuesday December 23rd.
I ordered a preslotted and radiused rosewood fretboard for this project a long time ago. I finally got it out to see what it looked like on top of a neck blank.
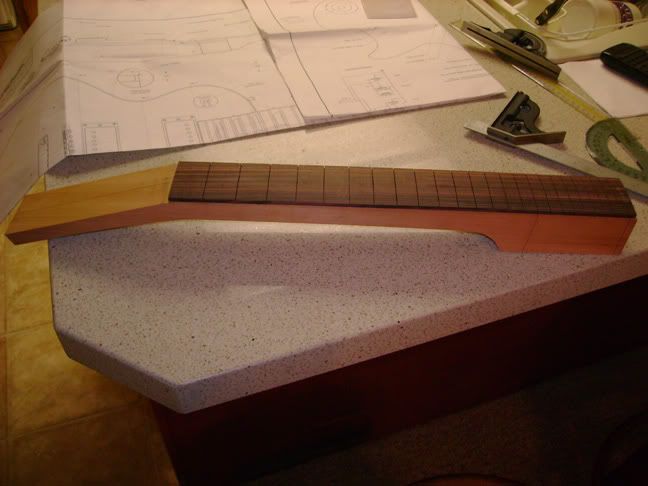
I'm also going to try and do the inlay (I've got the inlays and the tools for routing the fingerboard ready to go) this week as well.
Those of you that own Les Pauls know that the headstock isn't as wide as it should be. This is because on wings (additional strips of wood) are glued on to widen the headstock. Yes, this is how it is done on a real Les Paul. The reason for this is if you use a neck blank wide enough to make the full headstock you will waste a bunch of wood when you cut the taper in the neck. Remember that the necks are 1 11/16" at the nut and widen to slightly over 2" at the last fret. By making the neck blanks smaller and gluing on wings you can get more necks out of a billet. (A billet is a large board in its rough form before you cut neck blanks out of it.)
The next post will be about cutting the curved truss rod channel. This deserves its own post simply because it has caused the most stress. You will understand why when you read the submission.
If you're reading this blog please check in by making comments. I know a few who are following but I've heard there are a bunch of lurkers. Let me know what you think and give me some ideas for the next two Les Pauls.
5 comments:
Can't wait to see it when it's finished.
A trans. blue LP would be nice, especially with chrome hardware. I've always liked blue guitars for some reason.
Yeah I've always loved translucent blue as well. It especially looks cool with a quilt maple top.
You want an idea for the next two? Build me one!
Aceman from Seymour Duncan
Yeah, that sounds about right, so let the other one be a trans purple w/gold or black hardware (your choice), 24 frets and a Floyd Rose w/a Tremol-No for me!
KeeperOS from Seymour Duncan as well
(I know I know, we grow more by the minute)
Following your progress from Canada, AL. Thanks for taking the time to document this! I am especially interested in the way the neck comes together.
Post a Comment