January 22, 2009

Carving the Maple Top

It was time to decide how I was going to carve the top of the guitar. Initially I was going to use a friends duplicarver. A duplicarver is a device that can replicate a carving easily. Unfortunately my friend has moved so I had to find another method. Some builders carve entirely by hand. I decided on a hybrid method using power and hand tools. I drew out the topographic lines on a piece of MDF that I routed to the exact shape of my guitar. I also mapped out the bridge, tailpiece, and pickups and made rough representations of them. Photobucket The next step was to route the neck mortice in the mdf template. This was necessary because I didn't have a centerline to work with on the neck side of the guitar. By routing the mortice I gained access to the centerline. Photobucket The template is used as a guide for the router. The next step was to use the bandsaw to cut around the outermost topographical line. Photobucket I then affixed the template with double-stick tape. Photobucket I decided to try and take a video of what I was doing. You will have to pardon me I haven't done this before and my presentation skills are less than stellar. I shot this with my digital camera so pardon the sound and my breathing hard. It turns out that the mic is located a little close to my mouth.


That's it. The carve went great. I even started sanding things down just to get a feel for the amount of work I have left. I also pulled out my finger plane and used it to start the carve on the horn. Here's a pic of the finished rough carve: Photobucket Photobucket And here is a pic of the horn after using my ringer plane on it for about ten minutes: Photobucket

Wow, I'm glad that's over!

I'm happy with one exception. This carve brought out some weird grain/mineral (actually I don't know what it is) spots on the lower rear of the body. That's the weird brown blob you can see in the pics. The grain I don't mind so much but the mineral stuff is kind of black. I'm hoping it disappears as I sand in the recurve. If it doesn't that part will be under the darkest part of the burst so it shouldn't stand out too much.

January 20, 2009

Time To Do Some Catching Up

I've slacked off updating this blog so I'm going to attempt to catch up in the next few days.

I had the opportunity to cut the neck tenon. I've been debating how to do it for quite some time. I finally decided just to do it with the table router.

Photobucket
Photobucket

This method worked great because I hadn't yet tapered the neck and the sides of the neck were square. I was able to keep raising the cutter height until I had a perfect fit. I was also able to do the bottom end of the tenon the same way. A word of advice if you use this method: don't route the material off the tip of the tenon until the end as it helps support the neck and keep the neck.

FINALLY!!!!!!!!!!!!!!!!!!!!!!!!!!!!
Photobucket

The neck fits perfectly. It was tight enough I could pick up the body while just holding the neck. The centerline matches up dead on as well.

Here are a couple of pics with the fingerboard placed on top:
Photobucket
Photobucket

I was ambitious so I glued the wings on the headstock. I tried to match up the grain as well as I could but it wasn't perfect. I'm not really worried about it as I'll be putting an ebony or holly peghead veneer on the headstock.
Photobucket

Tapering

I purchased two long pieces of acrylic that were also very straight with the intention of using them to help me make a neck tapering jig. For whatever reason I dreading building another jig. While thinking about this it occured to me I could just use double sided taple and attach these boards directly and use them as router templates. I drew the taper on the neck and then placed one of the boards in line with the taper. I attached the other one as well but only to keep things level.
Photobucket

I then used my trusty Stew Mac template bit to route the taper.
Photobucket

I went really slow and eventually I ended up with this:
Photobucket

I forgot to mention that I routed the taper about 1/16" larger so I'd have a little room to carve. The process worked well. I was on such a roll I decided to use the same method for my fingerboard only this time I'd taper the exact size.
Photobucket
Photobucket

I was amazed how well this worked on the rosewood. My bit was going through the wood like a hot knife through butter. I got one side done and then reconfigured the acrylic guides to do the other side.

About five seconds prior to routing the other side of the fingerboard I reminded myself to double check that I was routing the correct side. Evidently five seconds is too long for my memory to work.........

You guessed it, I routed the first side again and since the guide was lined up with the other side I ended up with this:
Photobucket

I was unvelievably angry at myself. All that time I'd spent inlaying the board has now gone to waste. This is the first unrecoverable error I've made on this guitar. It was a costly error too as the cost of a new fingerboard and the inlays is about $60.

Even after a night of sleep I was still sick about the mistake. I really needed a victory to make me feel better. I decided to get busy with the headstock so i used some acrylic to make a routing template. The template worked great and this is how it ended up:
Photobucket
Photobucket
Photobucket

The router can't get into the top middle of the headstock where the two halves of the open book meet. I was going to use files to complete the cut but I kind of like the look how it is and may just leave it. It's softer but visually appealing. What do you guys think?

I've very happy the headstock came out so well. It took some of the sting out of wrecking my fingerboard.

As for the fingerboard I'm thinking of various things I could do with it. For sure I'm going to use it to practice fretting. After that I'm thinking about seeing if I can use a grinder and remove the inlays. If not I'll just mount it on the wall to remind me not to be stupid!

January 8, 2009

Gluing the Inlays

I'm posting two new posts today. Please scroll down to the post below this to see the start of the inlay process.

Today I had the opportunity to glue in my inlays. I used the fast setting two part Stew Mac epoxy. Honestly I kind of wish I had bought the stuff that cured a little more slowly and I would have liked a bit more time to fit the inlays. Things did work out well with the quick curing stuff so I'm not complaining.

After the inlays had a couple of hours to cure I put some 120 grit sticky sandpaper to my 12 degree radius sanding block and sanded the inlays flush with the fingerboard. Then I mixed some epoxy with some of the rosewood dust I'd collected when I routed the inlay cavities. The rosewood dust turned the epoxy a color that would match the fretboard. I put on some latex gloves and then used my finger to spread the epoxy on top and around the edges of the inlays to fill in any gaps. I left that to cure for a couple of hours and then sanded again with the 120 grit. The gap filling wasn't quite perfect so I repeated the process and this time it worked great! The smaller gaps disappeared entirely and you really have to look close to see the larger ones.

This is what the fretboard looked like after a flush sanded the inlays and then put epoxy on them to fill the gaps:
Photobucket

I finished sanded with 320 grit. Here are a few pics of the completed inlays:
Photobucket
Photobucket
Photobucket
Photobucket

As you can see some epoxy got in the fret slots. I now need to figure out a way to clean then up.

I'm very happy with how the inlays came out. I've had real Les Pauls that had far more gaps around the inlays.

Inlay

Yesterday I had the chance to do the inlay on my neck. I bought the neck from Stew Mac pre-radiused and pre-slotted. The Mother of Pearl inlays came from Grizzly.com

I knew the inlay had to be centered so I spent a lot of time figuring out how I needed to do this. The first thing I needed to do was mark the center of the fingerboard. I had already marked the centerline on the back of the fingerboard so it was easy to transfer the line to the top:

Photobucket

It was also necessary to mark the horizontal center in between each fret in which there is an inlay.
At this time it was necessary to decide How I would mark the fretboard. I decided to use masking tape. I layed out a length of the tape on my granite countertop. I then proceeded to mark the horizontal center and a vertical centerline on the tape.

Photobucket

I also made the same marking on each inlay:[IMG]http://i45.photobucket.com/albums/f68/shakarocks/Les%20Paul%20Build/Jan%207/DSC00856.jpg[/IMG]
You can see on one of the above photos that I aligned the vertical and center markings on the tape with the same markings on the inlay and then traced the outline of the inlay on the tape. After the outline was traced I used an exacto knife to cut out the shape of the inlay

Photobucket

I then peeled up the tape and placed it on the fretboard. I aligned the markings on the tape with the markings on the fretboard. This ensured that the inlay would be dead center.

Photobucket


Here's the board all taped up. If you look at tape for the lower frets you can see how I took a Sharpie an colored inside the tape. At this point I hadn't decided if I would leave the tape in place or just use the outline of the Sharpie.

Photobucket


As stated before the fretboard was pre-radiused. I also needed to radius the inlays. I stuck the inlays to a flat surface using double-sided and color them entirely with a pencil. Then I stuck some sandpaper to a radiused sanding block (12 degrees in this case) and start sanding. Once the pencil markings disappear entirely the inlay is radiused. I'd like to publicly thank Greg at BCR Music in Pennsylvania for the tip.

Photobucket

Photobucket


I have never attempted an inlay and really haven't used my Dremel much so I thought I'd practice on a piece of mahogany:

Photobucket


I used double-stick tape to attach the fretboard to the flat top of the table saw and then also used the tape to attach to long, straight pieces of acrylic that is used as a platform for the router base. (I left the brown protective paper backing on the acrylic.)
I had three sizes of spiral upcut buts for routing out the inlay. I chose the biggest bit and started hogging out material on each fret. When the dust got bad enough I couldn't see I would just move up the fretboard to the next inlay.

Photobucket


I swept up the sawdust from the inlays and placed it in a bowl. I will used it to color the epoxy I use to glue them in.
I got the cavity as close as I could and then switched to my smallest bit which is really tiny. In fact I accidently broke it working on the last cavity. Here's what the board looks like routed with the inlays fitted:

Photobucket


If you look at the above picture you will notice a block of wood attached to the acrylic with double-sided tape. I used this block as a fence for my Stew Mac router base so that I could at least make sure the top and bottom of each cavity is straight. Incidently the Stew Mac router base is worth every penny. My only complaint is that I wish it were a bit wider because sometimes it would fall off my acrylic platform when I got to the wider parts of the higher inlay cavities.
Here are a couple more pics. Inside the bowl is the rosewood dust I saved. I'm hoping it's plenty.

Photobucket

Photobucket


All things considered the process went very well. In fact I found using the Dremel to route the cavities to be rather enjoyable. There are a couple of small gaps that should disappear when I fill them with epoxy tinted with the rosewood dust.


I was going to wait to glue the inlays until after I'd successfully tapered the fretboard. I've since decided against this because I believe it would be better to sand the inlays flush with the fretboard having parallel edges. I'll glue the inlays in tomorrow. I also want to taper the fretboard. I've purchased a long piece of acrylic to make a tapering template.

January 3, 2009

Fitting the Truss Rod

So now that I have this nifty new truss rod slot I guess it's time to fit the rod. A few weeks back I bought a a long piece of maple at my local hardwoods emporium. This board was already planed to 1/2" and its sole purpose was to be the filet used to plug the slot.

The first thing that needed to happen was to get the board planed to close to 3/16" which is the size of the trus rod slot. You don't want to make it too small or it will have a loose fit. You don't want it too tight as all of the glue may squeeze out. So I ran the board through the DeWalt planer until it was close and then test fit it in the slot. I kept planing the board down a little at a time until it fit perfectly in the slot.
Photobucket
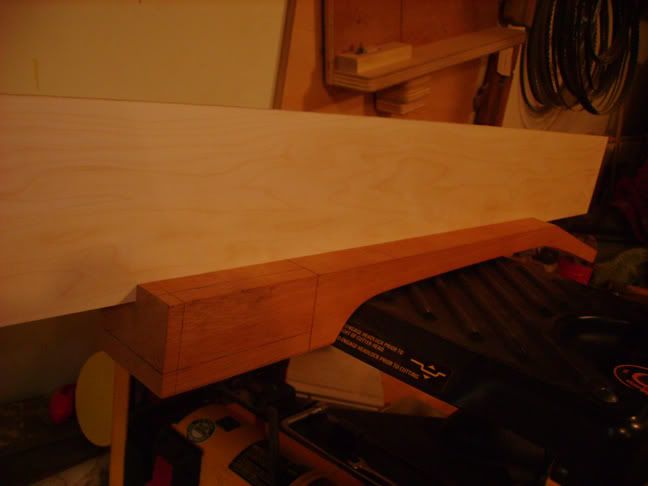
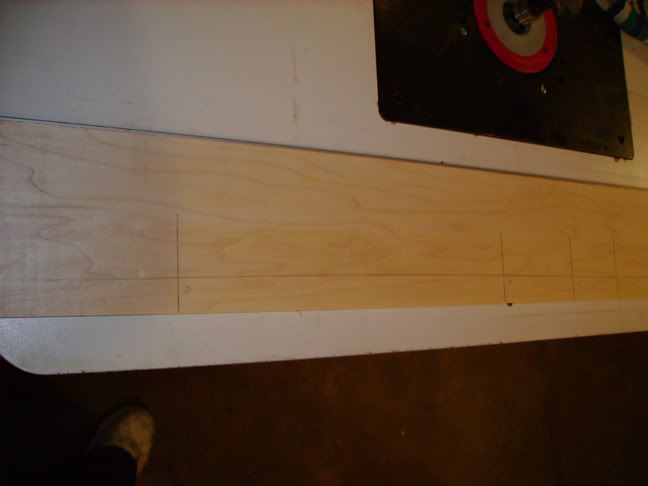
Next I marked out fret positions on the board and then used the curved truss rod jig to draw the curve on my filet.
Photobucket

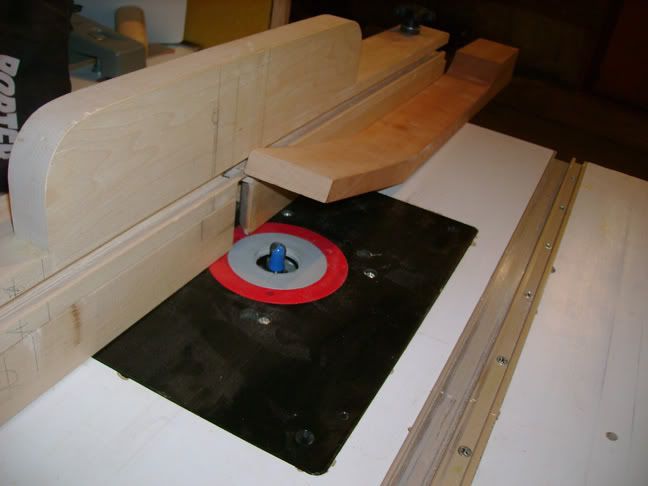
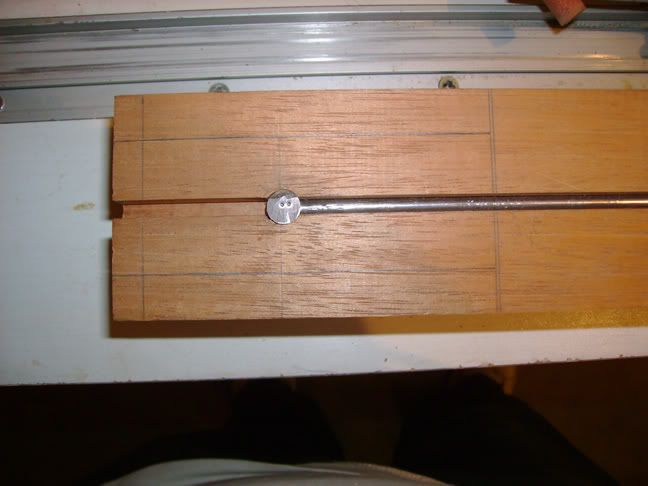
The truss rod access slot is the place where the truss rod sticks out at the headstock. This slot is necessary so that you can turn the truss rod nut with a wrench. To cut this slot I used a 1/2" bowl\cut bit (the top is shaped like a bowl). I put the fence on the router and set it so that the bit would follow the truss rod channel. I then adjusted the height of the bowl cut bit so that it would hit the headstock in the perfect place. I then ran the headstock over the bit about 1 1/2".
Photobucket

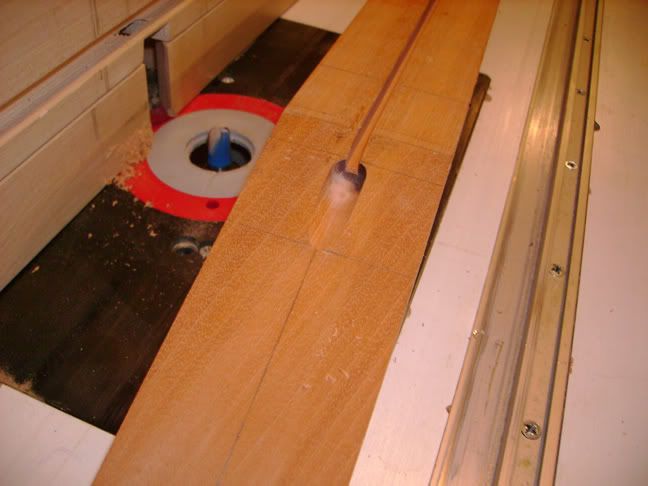
Here's what the channel looks like after being cut:
Photobucket

Honestly I wish I'd have used a 5/8" bowl cut bit just to make the slot a bit larger. I tried to widen the adjustment channel out with my Dremel but started to mess up the look of the slot so I quit. The washer and nut that fit on the rod must have a squared up area to rest against so I used a chisel to flatten the edge of the access slot. Here's what it looks like when the washer and nut are installed:

Photobucket

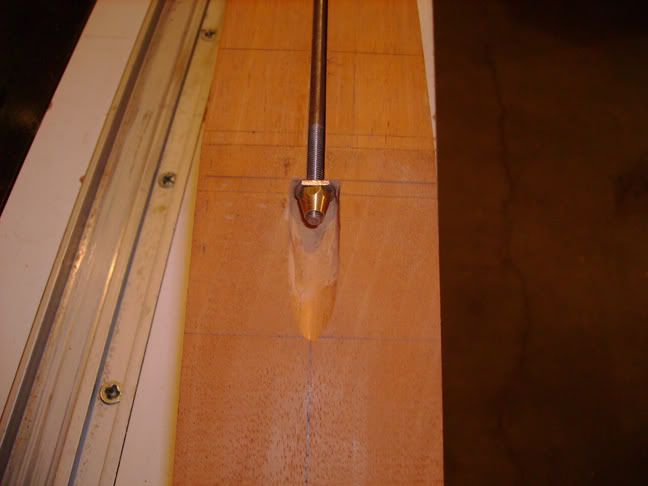
If you look at the washer you will notice that the top edge has been flattened. I flattened the edge with a bench grinder.

The other end of the truss rod must be anchored under the 21st fret. To accomplish this you must first trim the rod to the proper length and then use a tap on the end of the rod to cut the threads. When the threads are cut you can thread the anchor onto the rod. When the anchor is threaded as far as it can go you use a hammer to peen the excess rod up against the anchor so it will not turn. The proper tool for peening is a ball-peen hammer but I didn't have one. Instead my dad had this old hammer that worked about the same.

When the anchor is securely fitted to the rod you need to cut a slot for it in the neck. For this I used a forstner bit on the drill press. I can't remember what size I used but it fit the anchor perfectly.

Photobucket

I've seen some builds where the luthier mounted the anchor horizontal instead of vertical using a Dremel to hog out the necessary wood for the anchor slot. I'm not yet good with a Dremel (although I need to practice to do the inlays on the fretboard) so I chose to use the forstner bit and mount the anchor vertically. The anchor stuck up a tad so I used the bench grinder to whittle down one end a bit.

Back to the maple filet. I used the bandsaw to cut the curve on the filet and then smoothed it by hand sanding. I then fit the curved side down into the truss rod channel making sure that the fret markings on the neck and the filet matched up. When I pressed down on the filet I could feel the truss rod flex to accomodate the curve.

Photobucket

I decided I had a little too much of the filet sticking out of the topof the truss rod channel so I whittled it down using a disk sander. I almost forgot to make a smaller filet to fit the chanel on the other side of the anchor.

When I bought the wood for the filet I also bought some Tightbond Liquid Hide Glue. Hide glue is the traditional glue for luthiery. The reason hide glue is popular isn't so much that it holds well (although it does) but that parts glued together with it can be disassembled with a hot knife. The use of hide glue is the reason you can take the neck off a set neck guitar. The Tightbond version of hide glue is different than regular hide glue because it comes in a bottle. Regular hide glue is actually pellets that are dropped in a pot of water that is being heated by a hot plate. The pellets melt in the hot water and make glue. Kudos to Tightbond for inventing a more convenient version of hide glue.

Even my Tightbond Liquid Hide Glue wasn't without its quirks. I had it stored out in the garage where it is 45 degrees F. When I went to use the glue it had the consistancy of ballistics gel. I knew that I could warm up the hide glue by placing the bottle in a pot of warm water but I didn't want to wait. I pulled out the regular Tightbond II and used it instead. Tightbond II can also be a little thick when it's cold so I made sure the heat in the garage was at least 60 degrees F before gluing. Gluing the filet can be tricky because you do not want any glue leaking onto the truss rod. The easiest way to accomplish this is to only apply glue to the filet surface and not the walls of the truss rod channel. When you insert the filet into the channel the glue will the migrate up towards the top of the filet instead of down into the channel. After inserting the glued filet you then clamp it in being careful not to make sure the filet is tight but not TOO tight. Clamping also ensures that the rod bends to match the channel.

Photobucket

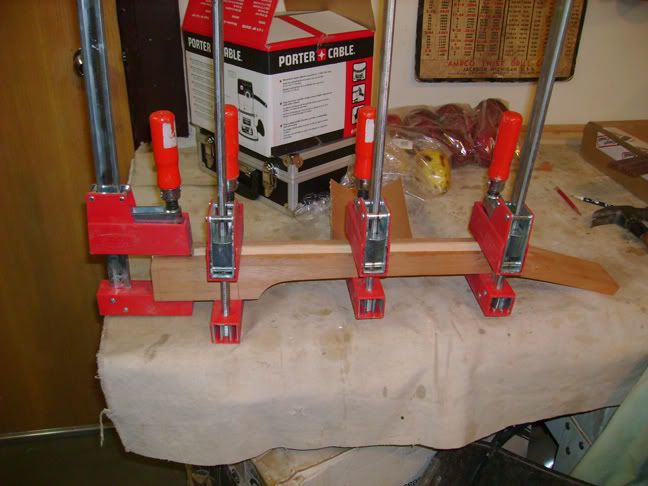
All these operations were being performed on NYE so I went party hopping for several hours before I came back and removed the clamps. Not to worry I also left the heat on in the garage while the glue was drying.

The next day I removed the clamps and inspected my work. Everything seemed fine so I preceeded to start trimming the filet flush with the neck. I used the disk sander to trim off most of the excess filet. When the filet was small enough I used my new 10mm IBEX finger plane to make the it very close to flush with the top of the neck. The finger plane proved to be the perfect tool and I only had to sand a bit to finish the job.

Photobucket

Whew, that went better than I'd hoped! I was feeling so good I decided to tackle fixing the neck mortice in the body. If you scroll back a few posts in this blog you will remember that I sort of screwed up the sides of the neck mortice. I fixed it by routing an additional 1/16" from each side of the mortice. Learning from past mistakes I was able to accomplish the fix without any errors. As you can see most of the burned wood on the sides is now gone. The small gash I made inside the mortice is also gone. Of course this alteration means I will have to widen the tenon on the neck an additional 1/16" on each side. No big deal.

My next task is to cut the tenon on the neck and the test fit the neck to the body. Hopefully I will have some time accomplish this during the weekend. I'm also starting to plan the top carve of the body.

I hope you enjoyed this submission. Please feel free to leave comments!